Have you ever wondered if installing a chimney cap is something you can do yourself?
Well, we're here to tell you that it is indeed possible, and we're about to share with you 5 easy steps to get it done.
Chimney cap installation may seem daunting at first, but with the right guidance and a little bit of patience, you'll be able to tackle this project like a pro.
So, let's dive in and discover how you can protect your chimney from debris and animals while ensuring proper ventilation for your fireplace.
Key Takeaways
- Properly measuring the dimensions of your chimney is crucial for selecting the right size chimney cap for a proper fit.
- Consider the benefits and disadvantages of different chimney cap materials and choose the one that best suits your specific needs and climate.
- Before installation, clean and inspect your chimney for any damage or structural issues, and consider alternative options such as chimney dampers or pots.
- During installation, ensure a snug fit, secure the chimney cap with stainless steel screws, and apply silicone sealant for a watertight seal. Regularly inspect and maintain the chimney cap to ensure its effectiveness.
Measure the Chimney for Accurate Cap Sizing
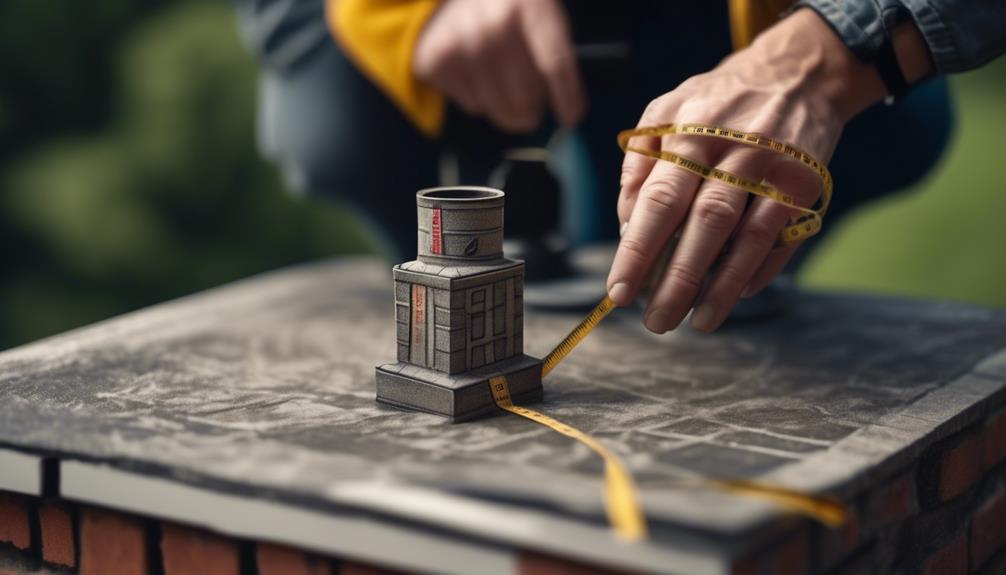
To ensure accurate cap sizing, we recommend measuring the dimensions of your chimney using a tape measure or ruler. Properly measuring your chimney is crucial in determining the correct size for your chimney cap. The chimney cap size should match the dimensions of your chimney to ensure a proper fit and optimal functionality.
When measuring your chimney, start by measuring the width and length of the chimney opening. This will give you the basic dimensions needed for selecting the right size cap. It's important to measure both the inside and outside dimensions of the chimney opening to account for any variations in size.
Additionally, consider the design of your chimney cap. There are different styles and designs available to suit various chimney types and needs. For example, if you have a multi-flue chimney, you may need a cap with multiple openings to accommodate each flue. Alternatively, if you have a single-flue chimney, a cap with a single opening would be suitable.
Choose the Right Chimney Cap Material
We recommend selecting the appropriate chimney cap material based on your specific needs and preferences. When it comes to choosing the right chimney cap material, there are a few factors to consider.
Firstly, the benefits of professional chimney cap installation can't be overstated. Hiring a professional ensures that the installation is done correctly and will help prevent common mistakes that homeowners often make.
One of the most common mistakes to avoid when choosing a chimney cap material is selecting a material that isn't suitable for your specific chimney. Different materials offer different advantages and disadvantages. For example, stainless steel chimney caps are durable and long-lasting, but they may not be the best choice for those living in coastal areas where saltwater corrosion is a concern. On the other hand, copper chimney caps are aesthetically pleasing and resistant to corrosion, but they can be more expensive.
Another important factor to consider is the climate in your area. If you live in an area with harsh winters, a chimney cap made of galvanized steel might be the best option as it can withstand extreme weather conditions. However, if you live in a warmer climate, a galvanized steel chimney cap mightn't be necessary.
Ultimately, choosing the right chimney cap material is crucial for the longevity and functionality of your chimney. By considering your specific needs, consulting with a professional, and avoiding common mistakes, you can ensure that you select the best chimney cap material for your home.
Prepare the Chimney for Installation

After considering the appropriate chimney cap material, the next step is to properly prepare the chimney for installation. This step is crucial to ensure a secure and effective chimney cap installation. By following these simple steps, you can ensure that your chimney cap will provide its full range of benefits.
Firstly, it is important to clean the chimney thoroughly. Remove any debris, such as leaves, twigs, or bird nests, that may have accumulated over time. This will prevent any blockages and allow for proper airflow.
Next, inspect the chimney for any damage or structural issues. Look for cracks, loose bricks, or deteriorating mortar. Addressing these issues before installing the chimney cap will help maintain the integrity of your chimney.
To further prepare the chimney, measure the dimensions of the flue opening. This will ensure that you select a chimney cap that fits properly. Installing a chimney cap that is too small or too large can lead to inefficiency and potential damage.
Lastly, consider the benefits of a chimney cap. It not only keeps out rain, snow, and debris, but also prevents animals from entering your chimney. Additionally, chimney caps can act as spark arrestors, reducing the risk of chimney fires.
While chimney caps offer numerous benefits, it is important to consider alternatives as well. Some alternatives include chimney dampers and chimney pots. Each option has its own advantages and disadvantages, so it is important to research and choose the best option for your specific needs.
Incorporating a table can provide a visual representation of the different chimney cap alternatives, making it easier for readers to compare and make informed decisions:
| Chimney Cap Alternatives | Pros | Cons |
|————————-|——|——|
| Chimney Dampers | – Offers greater control over airflow
- Helps conserve energy
- Protects against downdrafts | – Requires regular maintenance
- May need professional installation |
| Chimney Pots | – Enhances the aesthetic appeal of the chimney
- Provides additional height and ventilation
- Suitable for historic homes | – Can be expensive
- Limited in terms of size and style options
- May require reinforcement of the chimney structure |
Install the Chimney Cap Securely
For a secure and effective chimney cap installation, it's important to follow these steps carefully. Here are four crucial steps to ensure a secure chimney cap installation:
- Position the chimney cap: Place the chimney cap over the flue opening, making sure it fits snugly. Align the cap with the flue liner to ensure proper coverage and protection.
- Secure the cap with screws: Use stainless steel screws to secure the chimney cap firmly in place. Make sure to screw the cap into the mortar joints, avoiding any potential damage to the flue liner.
- Apply silicone sealant: Apply a generous amount of silicone sealant around the base of the chimney cap. This will create a watertight seal, preventing any moisture from entering the chimney system.
- Inspect the installation: Once the chimney cap is securely installed, carefully inspect the entire setup. Ensure that the cap is level and tight, with no gaps or loose screws. Additionally, check for any signs of damage or corrosion that may compromise its effectiveness.
Following these steps will help ensure a secure chimney cap installation, providing protection against water damage, animal intrusion, and debris buildup.
Always prioritize safety and consult a professional if you're unsure about any step of the installation process.
Perform a Final Inspection and Maintenance

Before completing the chimney cap installation, it's essential to perform a final inspection and ensure proper maintenance. Inspecting the chimney for damage is crucial to prevent any potential issues in the future. Start by examining the exterior of the chimney for cracks or loose bricks. These can allow moisture to seep in, causing further damage over time. Additionally, check for any signs of rust or corrosion on the chimney cap itself. If any damage is found, it's important to address it promptly to avoid further deterioration.
Maintaining the chimney for longevity is equally important. Regular cleaning is necessary to remove built-up soot and creosote, which can pose a fire hazard. A professional chimney sweep can help with this task, ensuring that the flue is clear and functioning properly.
It's also essential to regularly check and replace the chimney cap if needed. Over time, the cap may become damaged or lose its effectiveness, allowing debris or animals to enter the chimney.
Frequently Asked Questions
How Much Does a Chimney Cap Installation Typically Cost?
Chimney cap installation costs can vary depending on several factors. The cost typically includes the chimney cap materials and the installation process.
Factors that can affect the cost include the size and type of chimney cap, any additional repairs or modifications needed, and whether you hire a professional or do it yourself.
It's best to consult with a chimney professional to get an accurate estimate for your specific situation.
Can I Install a Chimney Cap Myself or Do I Need to Hire a Professional?
Yes, we can install a chimney cap ourselves without hiring professionals. DIY chimney cap installation is a feasible option for those who are comfortable working at heights and have basic handyman skills.
However, it's important to research and follow the proper steps to ensure a safe and effective installation. If unsure, it's always recommended to consult with a professional chimney technician who can provide guidance and expertise.
How Often Should I Clean My Chimney Cap?
Regular chimney cap maintenance is essential for the proper functioning of your chimney. It's recommended to clean your chimney cap at least once a year to remove any debris or blockages that may have accumulated.
However, the frequency of cleaning may vary depending on the usage and condition of your chimney.
It's also important to schedule regular chimney inspections to identify any potential issues and ensure the safety of your home.
Are There Any Specific Regulations or Codes I Need to Follow When Installing a Chimney Cap?
When it comes to chimney cap installation, there are specific regulations and codes that need to be followed.
Chimney cap regulations vary depending on your location, so it's important to research and understand the requirements in your area.
These regulations typically cover aspects such as proper sizing, materials, and clearances.
Adhering to these guidelines ensures that your chimney cap is installed correctly and safely.
It's always recommended to consult with a professional or local authorities to ensure compliance with chimney cap installation requirements.
What Are the Signs That My Chimney Cap Needs to Be Replaced?
When it comes to chimney cap replacement, it's important to keep an eye out for signs of damage. Some common indicators include rust, cracks, or missing pieces.
Regular chimney cap inspections are crucial to catch any issues early on and prevent further damage to your chimney and home. By staying proactive and addressing any necessary repairs or replacements, you can ensure that your chimney cap continues to protect your home from animals, debris, and water damage.