They say that ‘a stitch in time saves nine,’ and the same can be said about chimney cap installation. When it comes to protecting your home from water damage, critters, and debris, a properly installed chimney cap is essential.
But where do you start? In this comprehensive guide, we will walk you through the step-by-step process of expert chimney cap installation. From the tools and materials needed to the final inspection, we’ve got you covered.
So, whether you’re a seasoned DIY-er or a homeowner looking to tackle a new project, join us as we uncover the key to a well-protected chimney.
Key Takeaways
- Proper installation and regular maintenance of a chimney cap are crucial for its effectiveness and longevity.
- Chimney caps prevent debris, animals, and water from entering the chimney, improving its efficiency and protecting it from weather elements.
- When choosing a chimney cap, consider the dimensions of the chimney, opt for durable materials, and select a design that complements your home’s aesthetics.
- The installation process involves cleaning the chimney, securely attaching the cap to the flue opening and flue tile, and weatherproofing it with sealant. Regular inspections and maintenance are also important.
Importance of Chimney Cap Installation
Installing a chimney cap is an essential step in maintaining the functionality and safety of your chimney. Regular maintenance is crucial to ensure the proper operation of your chimney, and a chimney cap plays a vital role in this process.
One of the main benefits of professional installation is the guarantee of a secure and proper fit. Professionals have the knowledge and expertise to accurately measure and install a chimney cap that fits your chimney perfectly. This ensures that no debris, animals, or water can enter your chimney, preventing potential damage and blockages.
Regular maintenance is important because it allows for the early detection of any issues with your chimney cap. Professional installation ensures that the cap is properly secured, minimizing the risk of it becoming loose or damaged over time. Regular inspections and maintenance by professionals can identify any signs of wear and tear, allowing for timely repairs or replacements.
Additionally, a chimney cap offers protection against weather elements such as rain, snow, and wind. It prevents water from entering your chimney, which can cause damage to the internal structure and lead to costly repairs. It also prevents downdrafts from occurring, improving the overall efficiency of your fireplace or wood-burning stove.
Tools and Materials Required
After understanding the importance of chimney cap installation, it’s essential to gather the necessary tools and materials for the task at hand. Here is a list of the tools and materials you’ll need for a successful chimney cap installation:
- Chimney cap: Choose a cap that fits the dimensions of your chimney. It should have a sturdy construction and a mesh screen to prevent debris and animals from entering the chimney.
- Ladder: A sturdy ladder is necessary to access the roof safely. Make sure it’s tall enough to reach the chimney and stable enough to support your weight.
- Screwdriver or drill: Depending on the type of chimney cap you have chosen, you’ll need a screwdriver or drill to attach it securely to the chimney.
- Caulk or chimney sealant: To ensure a watertight seal, you’ll need caulk or chimney sealant. Apply it around the base of the chimney cap to prevent water from seeping in.
These tools and materials are essential for a successful chimney cap installation. Make sure to gather them before starting the installation steps to avoid any delays or complications.
Preparing the Chimney for Installation
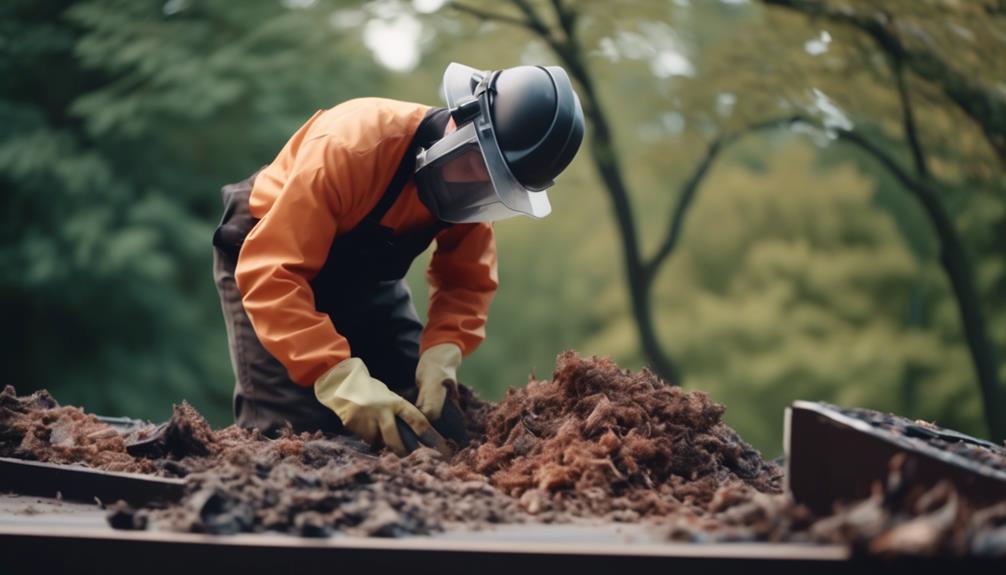
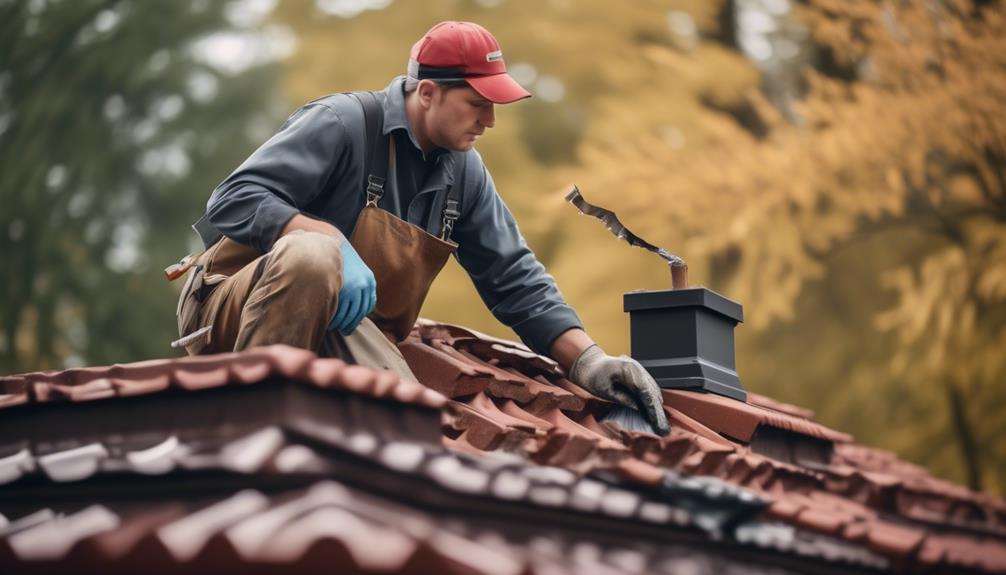
To prepare the chimney for installation, it is important to thoroughly clean the interior and exterior surfaces to ensure a secure and proper fit for the chimney cap. Before installing the cap, it is crucial to remove any debris, soot, or creosote buildup from the chimney. This can be done by using a chimney brush and a vacuum cleaner to clean the flue thoroughly. Additionally, the exterior surfaces of the chimney should be cleaned to remove any dirt, mold, or mildew that may hinder the installation process.
To provide a clear visual representation of the pre-installation cleaning process, the following 2-column, 4-row table illustrates the steps involved:
| Pre-Installation Cleaning Steps | Description |
|---|---|
| Step 1: Chimney Brush Cleaning | Use a chimney brush to remove debris, soot, and creosote buildup from the interior of the chimney. |
| Step 2: Vacuum Cleaning | Use a vacuum cleaner to remove loosened debris and ensure a clean and clear flue. |
| Step 3: Exterior Surface Cleaning | Clean the exterior surfaces of the chimney to remove dirt, mold, and mildew. |
| Step 4: Inspection | Inspect the chimney to ensure it is free from any obstacles that may hinder the cap installation process. |
Measuring and Choosing the Right Chimney Cap
Now let’s move on to the important points of measuring and choosing the right chimney cap.
To ensure proper installation, it’s crucial to take accurate measurements of your chimney. This includes measuring the dimensions of the flue opening and the overall size of the chimney.
Additionally, selecting the right style of chimney cap is essential for the cap to function effectively and complement the overall aesthetic of your home.
Proper Measurements for Cap
We will now delve into the crucial step of obtaining precise measurements for the chimney cap, ensuring an optimal fit and performance. Proper measurements are essential to guarantee the chimney cap covers the entire flue opening while allowing for proper ventilation.
Here are some key considerations for measuring and choosing the right chimney cap:
- Measuring techniques:
- Measure the inside dimensions of the flue opening to determine the cap size needed.
- Take multiple measurements to ensure accuracy and account for any irregularities.
- Consider the height of the cap to ensure it extends above the tallest point of the chimney.
- Common mistakes to avoid:
- Neglecting to account for any obstructions or protrusions on the chimney.
- Failing to measure the flue opening accurately, resulting in an ill-fitting cap.
- Choosing the right materials:
- Select a chimney cap made from durable materials like stainless steel or copper for long-lasting performance.
- Consider the design and style of the cap to ensure it complements the overall aesthetics of your home.
Selecting the Right Style
When selecting the right style for your chimney cap, it’s important to consider both functional and aesthetic factors. Choosing the right design involves evaluating various options that not only enhance the visual appeal of your chimney but also serve their intended purpose efficiently.
Firstly, assess the functionality of the chimney cap and determine the specific features required for your chimney’s needs, such as spark arrestors or animal screens.
Next, consider the aesthetic aspect by selecting a design that complements the overall look of your home. Take into account the materials, finishes, and colors available.
Additionally, it’s essential to consider budget constraints during this process. Look for options that strike a balance between affordability and quality, ensuring that you make a wise investment in your chimney cap.
Installing the Base of the Chimney Cap
To ensure a secure installation, begin by positioning the base of the chimney cap over the flue opening, aligning it with the edges for a precise fit. The base installation is a critical step in the chimney cap installation process.
Here are the steps to properly install the base:
- Step 1: Prepare the Base: Before placing the base, clean the flue opening and remove any debris or obstructions. This will ensure a clean and secure fit for the chimney cap.
- Step 2: Check the Base Material: Ensure that the base material is compatible with your chimney. Common chimney cap materials include stainless steel, galvanized steel, and copper. Choose a material that suits your needs and climate conditions.
- Step 3: Align the Base: Position the base over the flue opening, ensuring that it covers the entire opening and aligns properly with the edges. This will prevent any gaps or spaces where water or debris can enter.
- Step 4: Secure the Base: Use screws or other appropriate fasteners to secure the base to the chimney. Ensure that the screws are tight, but not so tight that they damage the base or chimney.
Attaching the Mesh or Spark Arrestor
Continuing the installation process, the next step after securing the base of the chimney cap is to attach the mesh or spark arrestor.
The mesh installation is crucial as it acts as a barrier to prevent debris, animals, and sparks from entering the chimney.
To begin, ensure that the mesh or spark arrestor is the correct size and material for your specific chimney cap. Place the mesh over the chimney opening, ensuring that it covers the entire area.
Use galvanized screws or stainless steel bolts to secure the mesh to the chimney cap. Make sure to space the screws or bolts evenly, approximately every four inches, to ensure a secure attachment.
Tighten the screws or bolts firmly but be cautious not to overtighten as it may damage the mesh. Inspect the attached mesh to ensure there are no gaps or loose areas.
Finally, test the mesh by gently pressing on it to ensure it’s securely attached and doesn’t move.
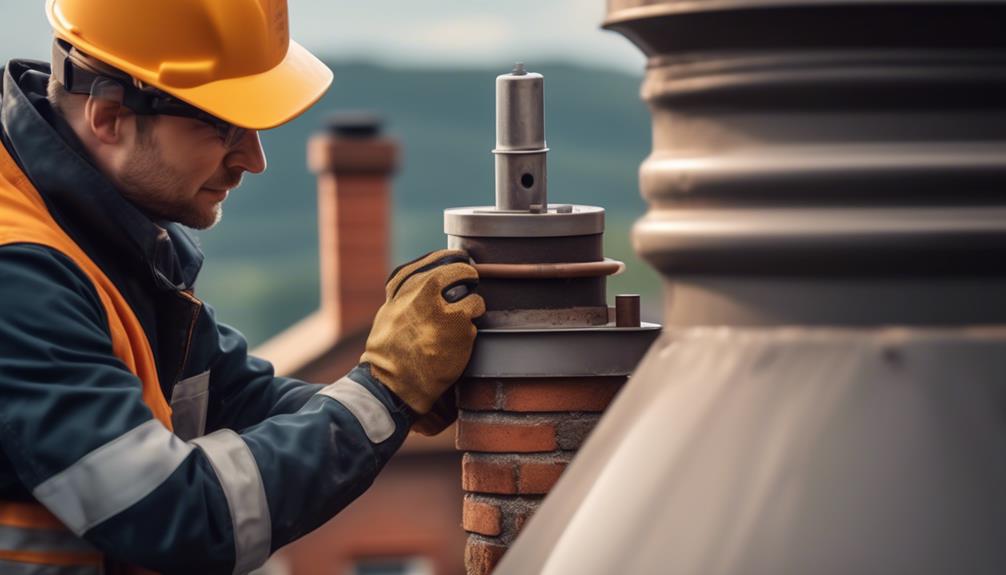
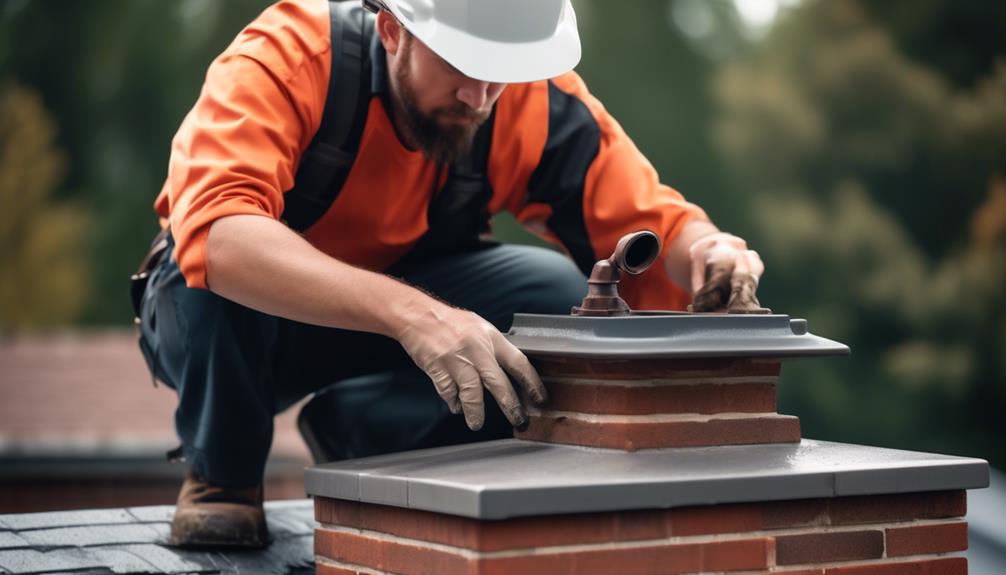
Securing the Chimney Cap to the Flue Tile
In order to securely attach the chimney cap to the flue tile, we’ll now discuss the necessary steps. Properly securing the chimney cap is crucial for its functionality and longevity. Here are the steps to complete this process:
- Step 1: Positioning the Cap: Carefully place the chimney cap on top of the flue tile, ensuring that it’s centered and aligned with the flue opening. Make sure it fits snugly, with no gaps or wobbling.
- Step 2: Drilling Pilot Holes: Use a masonry drill bit to create pilot holes through the flue tile. These holes will serve as anchor points for the screws that will secure the cap.
- Step 3: Installing Screws: Insert corrosion-resistant screws through the pilot holes and tighten them using a screwdriver or drill. Be cautious not to overtighten, as this may crack the flue tile.
- Step 4: Checking Stability: Once all screws are securely tightened, check the stability of the chimney cap by gently pushing on it from different angles. It should remain firmly in place.
Sealing and Weatherproofing the Chimney Cap
After securely attaching the chimney cap to the flue tile, the next step is to properly seal and weatherproof the cap to ensure its effectiveness and durability.
Sealing the chimney cap is crucial to preventing moisture from entering the chimney and causing damage. One of the most common sealing techniques is to use a high-quality silicone sealant. This sealant should be applied around the base of the cap, creating a watertight seal. It’s important to ensure that the entire perimeter of the cap is sealed to prevent any gaps where water could potentially enter.
In addition to sealing the chimney cap, it’s also important to weatherproof it. This involves protecting the cap from the elements to ensure its longevity.
One common weather-related issue is the accumulation of snow and ice on the cap. To prevent this, a snow guard can be installed on top of the cap. This will help to prevent snow and ice from building up and causing damage.
Another common issue is the corrosion of the cap due to exposure to rain and moisture. To combat this, a weatherproof coating can be applied to the cap. This coating acts as a barrier, protecting the cap from the elements and preventing rust and corrosion.
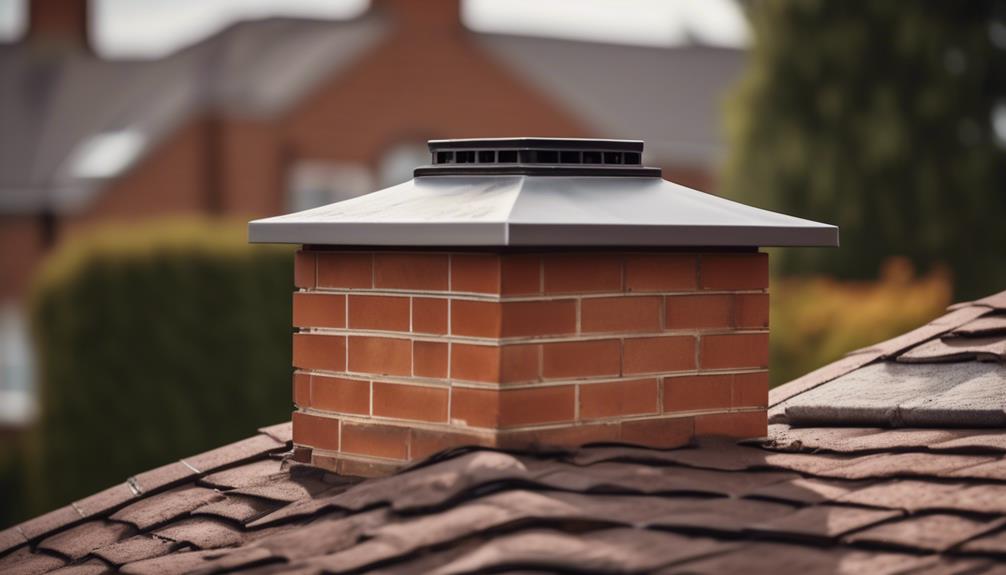
Inspecting the Installed Chimney Cap

Now that the chimney cap has been installed, it’s crucial to conduct a thorough inspection to ensure it’s in optimal condition.
Our visual inspection will involve checking for any signs of damage, such as cracks or dents, that could compromise the cap’s functionality.
Additionally, we’ll assess the fit of the cap to ensure it’s securely in place, and evaluate the effectiveness of the weatherproofing measures taken during installation.
Visual Inspection for Damage
Upon completion of the chimney cap installation, we recommend conducting a thorough visual inspection to identify any signs of damage or defects. This step is crucial in ensuring the chimney cap functions optimally and provides adequate protection for your chimney.
Here are the key areas to assess during the inspection:
- Overall condition: Examine the chimney cap for any visible cracks, dents, or corrosion that may compromise its structural integrity.
- Sealant integrity: Check the sealant around the edges of the chimney cap to ensure it’s intact and properly sealed, preventing water leakage.
- Mesh screen: Inspect the mesh screen for any tears or holes that may allow debris or animals to enter the chimney.
- Attachment stability: Verify that the chimney cap is securely attached to the chimney and that all screws or fasteners are tightly in place.
If any damage or defects are found during the inspection, promptly assess the extent of the damage and consider repair options to prevent further deterioration.
Checking for Proper Fit
To ensure the chimney cap is properly installed, it is essential to carefully inspect its fit and alignment. After securing the cap to the chimney, visually assess its position and make sure it is centered and level. A proper fit is crucial to ensure optimal functionality and protection against debris and animals.
To assist in checking for proper fit, use proper measurement techniques to ensure the cap is the correct size for your chimney. Measure the outer dimensions of the chimney crown and select a cap that matches those dimensions. Additionally, measure the flue tile or liner to ensure the cap will fit securely.
Troubleshooting common installation issues can help identify any problems with the fit. Common issues include caps that are too large or too small, misalignment, or gaps between the cap and the chimney crown. To address these issues, consider adjusting the cap’s position or using shims to fill any gaps.
Table:
| Common Installation Issues | Troubleshooting |
|---|---|
| Caps that are too large or too small | Measure the chimney crown and flue tile accurately |
| Misalignment | Adjust the cap’s position |
| Gaps between the cap and the chimney crown | Use shims to fill the gaps |
Assessing Weatherproofing Effectiveness
Inspect the installed chimney cap to determine its effectiveness in weatherproofing. Evaluating the durability and assessing the effectiveness of the chimney cap is crucial to ensure its proper functioning. Here are four key aspects to consider when assessing weatherproofing effectiveness:
- Material quality: Check the quality of the materials used in the cap’s construction. Look for sturdy materials that can withstand harsh weather conditions.
- Sealing: Inspect the seal between the chimney cap and the chimney structure. A well-sealed cap prevents rain, snow, and debris from entering the chimney.
- Ventilation: Ensure that the cap allows proper ventilation to prevent condensation and moisture buildup inside the chimney.
- Drainage: Assess the cap’s ability to channel water away from the chimney structure. Proper drainage prevents water damage and extends the cap’s lifespan.
Maintenance Tips for Long-lasting Performance
Regular maintenance is essential for ensuring the long-lasting performance of your chimney cap. By following proper maintenance techniques, you can prevent common chimney cap problems and extend the lifespan of your cap. Here are some important tips to keep in mind:
| Maintenance Tips | Frequency |
|---|---|
| Inspect for damage | Annually |
| Clean debris and soot | Biannually |
| Check for animal nests | Annually |
| Ensure proper ventilation | Regularly |
Regular inspections are crucial to identify any damage or wear and tear. Look for cracks, rust, or loose parts during your annual inspection. If you notice any issues, it’s important to address them promptly to prevent further damage. Additionally, cleaning your chimney cap biannually will help remove debris and soot buildup, ensuring proper airflow and preventing blockages. Check for animal nests annually, as they can obstruct the cap and create potential fire hazards.
In addition to these maintenance techniques, it’s important to ensure proper ventilation. Blocked or restricted airflow can lead to poor chimney performance and increased risk of chimney fires. Regularly check that the cap is not obstructed by leaves, branches, or other debris.
Frequently Asked Questions
What Are the Benefits of Installing a Chimney Cap?
Installing a chimney cap offers several advantages.
It acts like a protective shield, preventing debris, animals, and rain from entering the chimney. This not only keeps your chimney clean but also reduces the risk of blockages and damage.
The installation process involves measuring the chimney, selecting the right cap, and securing it in place.
It’s important to follow proper installation techniques to ensure a secure and effective chimney cap that will provide years of protection.
Can I Install a Chimney Cap Myself or Should I Hire a Professional?
When it comes to DIY chimney cap installation or hiring a professional, there are a few things to consider.
While installing a chimney cap yourself may seem like a cost-effective option, it’s crucial to have the necessary skills and knowledge for a successful installation.
Hiring a chimney cap professional ensures that the job is done correctly, minimizing the risk of problems in the future. Additionally, professionals have the experience and tools to handle any unexpected challenges that may arise during the installation process.
How Often Should I Clean My Chimney Cap?
How often should we clean our chimney cap? This is a common question that many homeowners ask.
It’s important to keep your chimney cap clean to prevent blockages and ensure proper ventilation.
While some may think that cleaning a chimney cap is a simple task that can be done by themselves, it’s recommended to hire a professional for this job.
Professionals have the knowledge and equipment to thoroughly clean the chimney cap, ensuring it’s functioning optimally and keeping your home safe.
Are There Different Types of Chimney Caps Available? if So, Which One Is Best for My Chimney?
There are indeed different types of chimney caps available, each with its own set of pros and cons.
Some common materials used for chimney caps include stainless steel, copper, and galvanized steel.
Stainless steel caps are durable and resistant to rust, while copper caps offer an attractive appearance and natural weather resistance.
Galvanized steel caps are more affordable but may not last as long.
The best chimney cap for your chimney will depend on factors such as your budget, aesthetic preferences, and specific needs.
How Do I Know if My Chimney Cap Needs to Be Replaced?
To determine if your chimney cap needs replacing, look for signs of damage such as rust, corrosion, or cracks. Additionally, check if there are any gaps or openings that could allow animals to enter.
Chimney caps play a crucial role in preventing animal entry, so it’s essential to ensure they’re in good condition. Regular inspections and maintenance are key to identifying any issues and keeping your chimney cap functioning properly.