When it comes to our homes, the roof stands tall as a symbol of protection and security. But what happens when that symbol starts to show signs of wear and tear? That's where we come in.
In this step-by-step guide, we will walk you through the process of flat roof installation and repair. From assessing the condition of your existing roof to performing a final inspection, we've got you covered.
So, if you're ready to ensure the longevity and functionality of your roof, keep reading to discover the secrets of a successful flat roof project.
Key Takeaways
- Determining the scope of the project is crucial before starting any flat roof installation or repair work.
- Proper insulation and vapor barrier installation are essential for a flat roof system to prevent heat loss and moisture damage.
- Flashing installation and regular maintenance of the drainage system are important to ensure the longevity and functionality of the flat roof.
- Regular roof maintenance and inspection can prevent potential issues and ensure optimal performance, saving costs in the long run.
Determine the Scope of the Project

To properly execute a flat roof installation or repair project, it's crucial to determine the scope of the work involved. Determining the budget and hiring professional contractors are two key aspects of this process.
When determining the budget for a flat roof project, it's important to consider various factors. These include the size of the roof, the materials needed, and any additional work required, such as insulation or ventilation. It's recommended to get quotes from multiple contractors to ensure you have an accurate estimate of the costs involved. This will help you set a realistic budget and avoid any surprises later on.
Hiring professional contractors is essential for a successful flat roof project. They have the necessary skills, expertise, and equipment to handle the job effectively. Look for contractors with experience in flat roof installations or repairs, as they'll be familiar with the specific challenges and requirements of this type of roofing. Check their credentials, read reviews from previous clients, and ask for references to ensure you're hiring a reputable contractor.
Assess the Condition of the Existing Roof
Now that the scope of the project has been determined, the next step is to assess the condition of the existing roof. Assessing roof damage is crucial to determine the extent of repairs or replacement needed. Roof inspection techniques can help identify potential issues and provide insight into the overall condition of the roof.
One common technique used to assess the condition of a flat roof is a visual inspection. This involves carefully examining the roof surface, looking for signs of damage such as cracks, blisters, or ponding water. It's important to check the seams and edges as they're vulnerable areas prone to leaks.
Another technique is a moisture survey, which involves using specialized tools to detect moisture levels within the roof system. This can help identify areas that are prone to leaks or water damage.
Roof inspectors may also perform a core sample analysis to assess the condition of the roof layers. This involves taking small samples from the roof surface to examine the layers beneath. This analysis can provide valuable information about the roof's composition, potential leaks, and overall condition.
It is important to conduct a thorough roof assessment to accurately determine the necessary repairs or replacement. By using these roof inspection techniques, potential issues can be identified and addressed promptly, ensuring a properly functioning and long-lasting flat roof.
Obtain Necessary Permits and Approvals

Before beginning any flat roof installation or repair project, it's essential to obtain the necessary permits and approvals. This ensures that you're in compliance with local building codes and regulations.
The permit application process may vary depending on your location, but there are some general steps you can follow.
- Research local requirements: Start by familiarizing yourself with the permit application process in your area. Contact your local building department or visit their website to gather information on the necessary permits and any specific regulations you need to comply with.
- Gather required documents: Prepare all the necessary documents for your permit application. This may include blueprints, engineering reports, and specifications for the materials and equipment you plan to use.
- Complete the application: Fill out the permit application form accurately and provide all the requested information. Be prepared to pay any fees associated with the permit application.
- Submit the application: Once you have completed the application, submit it to the appropriate department. This may be done in person, by mail, or online, depending on the procedures in your area.
- Wait for approval: The approval process can take some time, so be patient. During this time, the building department will review your application and ensure that your project meets all the necessary regulatory compliance considerations.
Gather the Required Materials and Tools
We will now discuss how to gather all the necessary materials and tools for your flat roof installation or repair project. Choosing the right materials is crucial to ensure a durable and long-lasting roof. Start by measuring the area of your roof to determine the amount of materials needed. Common materials for flat roofs include roofing membranes, insulation boards, adhesives, fasteners, and flashings. Consider factors such as weather resistance, durability, and cost when selecting the materials.
Next, gather the tools required for the installation or repair. These typically include a utility knife, tape measure, chalk line, roofing hammer, screwdriver, ladder, safety harness, and a nail gun. It's essential to prioritize safety during the installation process. Ensure you have safety equipment, such as gloves, safety glasses, and a hard hat. Additionally, consider using a fall protection system, such as guardrails or safety nets, to prevent accidents.
Before starting the project, read the manufacturer's instructions for the materials and tools you'll be using. Familiarize yourself with the proper techniques and safety precautions. Following these guidelines will help you complete the installation or repair efficiently and safely.
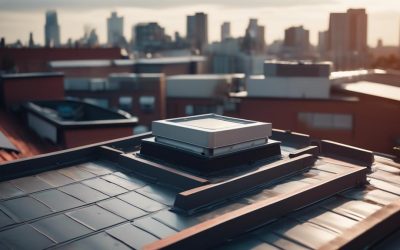
Preparing the Roof Surface
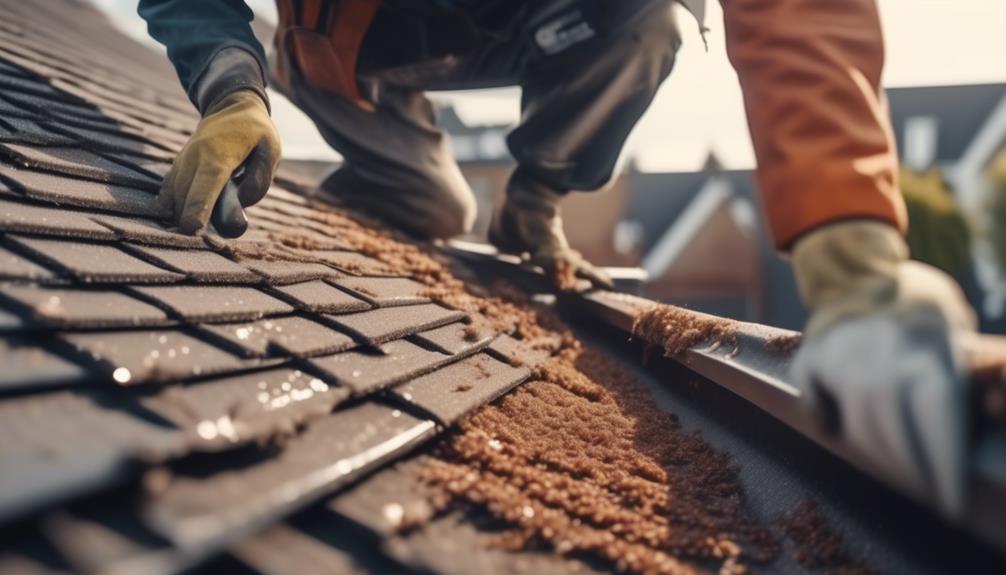
To properly prepare the roof surface, it's important to clean and remove any debris or loose materials. This ensures a clean and smooth base for the subsequent steps of the flat roof installation or repair process. Here are the essential tasks to accomplish during roof surface preparation:
- Cleaning: Thoroughly sweep or use a leaf blower to remove leaves, twigs, dirt, and other debris from the roof surface. This prevents them from becoming trapped under the roofing materials, leading to potential damage or leaks.
- Priming: Apply a primer to the roof surface to enhance adhesion and promote a better bond between the substrate and the roofing material. This step is vital to ensure the longevity and effectiveness of the flat roof.
- Substrate Repair: Inspect the roof surface for any signs of damage, such as cracks, holes, or deteriorated areas. Repair these issues promptly to prevent further damage and potential leaks.
- Leveling: Check for any uneven areas on the roof surface and use a leveling compound to create a smooth and level substrate. This step is crucial for proper water drainage and to prevent ponding on the roof.
- Surface Inspection: Finally, perform a thorough inspection of the roof surface to ensure it's free from any remaining debris, properly primed, and repaired. This will guarantee a solid foundation for the subsequent steps of the flat roof installation or repair process.
Installing Insulation and Vapor Barrier
Now let's talk about the important points when it comes to installing insulation and a vapor barrier on a flat roof.
First, we need to consider the different types of insulation available and choose the most suitable one for the specific roof.
Then, we'll discuss the proper installation of a vapor barrier to prevent moisture from penetrating the roof structure.
Insulation Types
Different insulation types can be used when installing insulation and a vapor barrier for flat roof systems. Here are five options to consider:
- Fiberglass insulation: This traditional insulation material offers excellent thermal performance and is cost-effective. It's easy to install and provides good sound absorption.
- Spray foam insulation: This type of insulation expands to fill gaps and provides superior air sealing. It also offers high R-value and can improve energy efficiency.
- Cellulose insulation: Made from recycled materials, cellulose insulation is eco-friendly and provides good thermal performance. It's resistant to pests and mold.
- Polyurethane insulation: This insulation material is known for its high R-value and excellent thermal resistance. It's suitable for both new construction and retrofit projects.
- Mineral wool insulation: This type of insulation is fire-resistant and offers good thermal and sound insulation properties. It's made from natural minerals and is environmentally friendly.
When choosing insulation for your flat roof, consider factors such as cost, performance, and environmental impact.
Vapor Barrier Installation
When installing insulation and a vapor barrier for your flat roof, it is important to carefully consider the proper installation techniques and materials to ensure maximum performance and protection. A vapor barrier is a crucial component of a flat roof system as it helps to prevent moisture from entering the roof assembly. By controlling the movement of moisture, a vapor barrier can significantly reduce the risk of mold growth, rot, and structural damage.
Here is a table evaluating different vapor barrier materials:
| Material | Benefits | Evaluation |
|---|---|---|
| Polyethylene | Easy to install, cost-effective | Not suitable for high-temperature applications |
| Bitumen | Durable, heat-resistant | Requires professional installation |
| EPDM | Excellent moisture resistance, flexibility | Higher initial cost, may require specialized installation techniques |
Lay Down the Roofing Membrane

Now let's move on to the crucial step of laying down the roofing membrane.
There are specific techniques for applying the membrane to ensure proper adhesion and a watertight seal.
We'll discuss these techniques and provide guidance on how to ensure the membrane is installed correctly.
Membrane Application Techniques
To effectively install the roofing membrane, we utilize specific techniques that ensure a secure and long-lasting application. Here are some key membrane application techniques to consider:
- Adhesive Application: We apply a high-quality adhesive to bond the membrane to the roof surface, ensuring a strong and durable connection.
- Rolling Method: Using a roller, we carefully roll out the membrane onto the roof, ensuring even coverage and minimizing the risk of wrinkles or bubbles.
- Heat Welding: In certain cases, we use heat welding to bond the seams of the membrane together, creating a watertight seal that enhances the roof's waterproofing capabilities.
- Flashing Installation: Properly installing flashing around roof edges, vents, and other protrusions is crucial for preventing water infiltration and ensuring the integrity of the roofing system.
- Quality Control: We conduct thorough inspections throughout the membrane application process to ensure that all areas are properly covered and that the membrane is securely adhered to the roof.
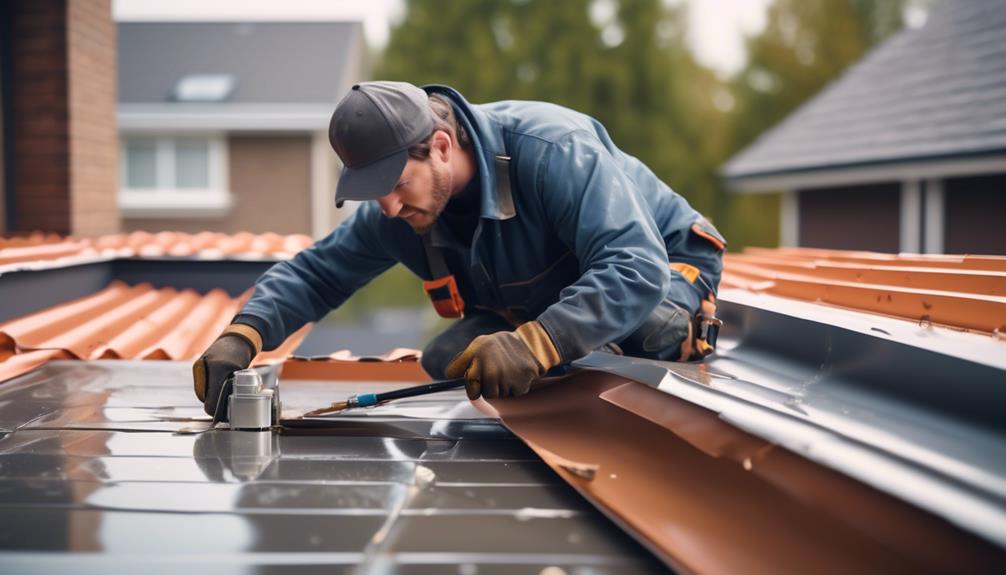
Ensuring Proper Adhesion
For proper adhesion of the roofing membrane, we carefully lay it down using precise techniques to ensure a secure and long-lasting installation.
Before starting the process, proper preparation is crucial. The substrate should be clean, dry, and free of any debris or contaminants. Any damaged areas should be repaired, and the surface should be smooth and even.
Once the surface is ready, we can choose from different adhesive types depending on the specific requirements of the project. Common adhesive options include water-based adhesives, solvent-based adhesives, and hot asphalt.
The adhesive is applied to both the substrate and the backside of the roofing membrane using a brush, roller, or spray system. It's important to follow the manufacturer's instructions for the specific adhesive being used.
Careful attention to detail during the adhesive application process will ensure proper adhesion and a successful flat roof installation.
Secure the Edges and Seams
To ensure a secure and watertight flat roof, edges and seams must be properly sealed and reinforced. Edge sealing and seam reinforcement are crucial steps in preventing leaks and water damage. Here are five important considerations when securing the edges and seams of a flat roof:
- High-quality sealants: Use a premium quality sealant specifically designed for flat roofs. This will provide superior adhesion and ensure long-lasting protection.
- Proper application technique: Apply the sealant evenly and generously along the edges and seams, making sure to cover any gaps or cracks. Use a brush or roller for easy and precise application.
- Reinforcing fabric: To strengthen the seams, embed a reinforcing fabric into the sealant. This fabric will add durability and prevent future cracking or separation.
- Regular inspections: Regularly inspect the edges and seams for any signs of damage or wear. Promptly address any issues to prevent further damage and maintain the integrity of the flat roof.
- Professional installation: For complex repairs or installations, it's best to seek the assistance of a professional roofing contractor. They have the expertise and equipment to ensure proper edge sealing and seam reinforcement.
Install Flashing and Drainage Systems
Now let's talk about the points of flashing installation techniques and drainage system maintenance.
When it comes to flashing, we'll cover the proper techniques for installing it around roof penetrations, such as vents and chimneys, to ensure a watertight seal.
Additionally, we'll discuss the importance of maintaining the drainage system to prevent water accumulation and potential damage to the flat roof.
Flashing Installation Techniques
When installing flashing and drainage systems for a flat roof, it's crucial to follow proper techniques to ensure optimal performance and prevent water damage. Here are some important considerations to keep in mind:
- Flashing material options: Choose the appropriate flashing material based on the specific requirements of your roof, such as metal, rubber, or PVC. Consider factors like durability, weather resistance, and compatibility with the roofing material.
- Proper installation: Ensure that the flashing is securely attached to the roof surface and properly sealed to prevent water infiltration. Use appropriate fasteners and adhesives based on the type of flashing and roofing material.
- Seamless integration: Ensure that the flashing is seamlessly integrated with other roofing components, such as vents, skylights, and chimneys. This will help maintain a watertight seal and prevent leaks.
- Regular inspections: Regularly inspect the flashing for signs of damage or deterioration. Address any issues promptly to prevent water damage and costly repairs.
- Avoiding common flashing mistakes: Be aware of common mistakes, such as improper overlap, inadequate sealing, and using incompatible materials. Following manufacturer guidelines and consulting with professionals can help avoid these mistakes.
Following these flashing installation techniques will help ensure a durable and watertight flat roof system.
Drainage System Maintenance
As we move on to discussing drainage system maintenance, it's essential to ensure proper installation and maintenance of both flashing and drainage systems for a flat roof to prevent water damage and maintain optimal performance.
Roof maintenance plays a crucial role in ensuring the longevity of a flat roof, and the drainage system is an integral part of that maintenance. Regular gutter cleaning is necessary to remove debris such as leaves, twigs, and dirt that can clog the system and impede water flow. This simple task helps prevent water buildup on the roof and potential leaks.
Additionally, inspecting the flashing regularly is crucial to identify any signs of damage or deterioration. Prompt repairs or replacements can prevent water from seeping into the roof structure and causing further damage.
With regular maintenance and cleaning, the drainage system can effectively remove water from the roof and protect it from potential water-related issues.
Perform a Final Inspection and Maintenance
To ensure the longevity and optimal performance of your flat roof, conducting a thorough final inspection and performing necessary maintenance is crucial. A final inspection allows you to identify any potential issues and address them promptly before they escalate into costly repairs. Here are some essential maintenance tasks to include in your final inspection checklist:
- Clear debris: Remove any leaves, branches, or other debris that may have accumulated on the roof. This helps prevent clogging of drains and promotes proper water flow.
- Check for cracks and leaks: Inspect the roof surface for any signs of cracks or leaks. These can lead to water infiltration and damage the underlying structure if left unattended.
- Evaluate flashing and seals: Examine the integrity of the flashing around vents, skylights, and other roof penetrations. Ensure that the seals are intact to prevent water seepage.
- Inspect gutters and downspouts: Check the condition of the gutters and downspouts, ensuring they're free from blockages and securely attached. Proper drainage is essential to prevent water buildup and potential roof damage.
- Trim overhanging branches: Trim any branches that are in close proximity to the roof. Falling branches can cause significant damage during storms or high winds.
Frequently Asked Questions
How Long Does a Flat Roof Installation or Repair Typically Take?
On average, a flat roof installation or repair typically takes several days to complete. The duration can vary depending on various factors such as the size of the roof, the complexity of the project, and the weather conditions.
It's important to consider these factors when planning for a flat roof installation or repair to ensure that the timeline is accurately estimated and any potential delays are accounted for.
Can I Install a New Flat Roof Over an Existing One?
Yes, you can install a new flat roof over an existing one. This method, known as a roof overlay, has both advantages and disadvantages.
The main advantage is that it saves time and money by avoiding the need to remove the old roof.
However, it can add extra weight to the structure and may not address underlying issues.
It's important to assess the condition of the existing roof and consult with a professional to determine if a roof overlay is suitable for your specific situation.
What Are the Most Common Problems That Can Occur With a Flat Roof and How Can They Be Prevented?
Common flat roof problems can be a headache, but there are preventive measures to keep them at bay. Regular inspections help identify issues like leaks, ponding water, and membrane damage.
Clearing debris and maintaining proper drainage are key.
Applying roof coatings and sealants can enhance durability and prevent leaks.
Lastly, ensuring proper installation and using quality materials can prevent problems down the line.
Stay proactive and save yourself from costly repairs.
Are There Any Specific Maintenance Tasks That Should Be Done Regularly to Ensure the Longevity of a Flat Roof?
Regular maintenance tasks are essential to ensure the longevity of a flat roof. By staying on top of these tasks, we can prevent costly repairs down the line.
Some of the main tasks involved in flat roof maintenance include:
- Inspecting for any signs of damage or leaks: Regularly checking the roof for any visible signs of damage or leaks is crucial. This can include looking for cracks, tears, or any areas where water may be seeping in.
- Clearing debris: Leaves, branches, and other debris can accumulate on a flat roof, potentially causing water buildup and damage. Regularly removing debris helps to prevent clogged drains and protect the roof from unnecessary weight.
- Ensuring proper drainage: Proper drainage is essential for a flat roof. Regularly checking and cleaning gutters, downspouts, and drains helps to ensure that water can flow freely off the roof, reducing the risk of leaks or water damage.
Taking a proactive approach and addressing any issues promptly is key to maintaining the structural integrity of the roof. By doing so, we can extend the lifespan of our flat roof and avoid any unforeseen headaches.
How Much Does a Flat Roof Installation or Repair Typically Cost?
When it comes to flat roof installation or repair, the cost can vary depending on several factors.
The type of flat roof material options available, such as EPDM, TPO, or PVC, can affect the overall cost.
Other factors that come into play include the size of the roof, the complexity of the project, and any additional repairs or modifications needed.
It's best to consult with a professional roofing contractor to get an accurate estimate for your specific situation.