As homeowners, we all want our roofs to be strong and reliable, shielding us from the elements like a steadfast guardian.
But sometimes, even the sturdiest roofs need a little extra help to maintain their integrity. That's where DIY roof coatings come in.
With just a few essential tips, you can transform your roof into a fortress of protection, extending its lifespan and saving you money in the long run.
So, whether you're a seasoned DIY enthusiast or just starting out, buckle up and get ready to discover the secrets of effective DIY roof coatings.
Your roof will thank you.
Key Takeaways
- DIY roof coatings can save you money by being more affordable than hiring professionals.
- Different types of roof coatings have different characteristics, so it's important to choose the one that suits your needs and budget.
- Consider climate and material when selecting a roof coating to ensure optimal performance and longevity.
- Proper surface preparation and repairing any damage before applying the roof coating are crucial for a successful DIY project.
Benefits of DIY Roof Coatings
When considering roof maintenance options, homeowners can reap numerous benefits from opting for DIY roof coatings. One of the most significant advantages is cost savings. Hiring professional contractors for roof repairs and maintenance can be quite expensive, but by taking on the task yourself, you can save a significant amount of money. DIY roof coatings are more affordable than hiring professionals, and the materials needed are readily available at local hardware stores. Additionally, by doing the work yourself, you eliminate the need for labor costs, which further contributes to the overall cost savings.
Another benefit of DIY roof coatings is durability. When applied correctly, these coatings can extend the lifespan of your roof by providing an extra layer of protection against harsh weather conditions, UV radiation, and general wear and tear. The coatings act as a barrier, preventing water from seeping into the underlying layers of your roof and causing damage. With regular maintenance and reapplication of the coating, you can ensure that your roof remains in optimal condition for years to come.
Choosing the Right Roof Coating
When it comes to choosing the right roof coating for your DIY project, understanding the different coating types and considering factors such as climate and material is crucial.
There are various options available, including acrylic, silicone, and elastomeric coatings, each with its own advantages and limitations.
Coating Types: Understanding Options
To choose the right roof coating, it's important to understand the various options available and their specific characteristics. Here are the different coating options along with their pros and cons:
- Acrylic Coatings:
- Acrylic coatings are popular due to their affordability and ease of application.
- They provide excellent UV protection and reflectivity, helping to reduce energy costs.
- However, they may not be as durable as other options and could require more frequent reapplication.
- Silicone Coatings:
- Silicone coatings offer superior waterproofing properties and are highly resistant to ponding water.
- They also have excellent UV resistance and can withstand extreme temperature fluctuations.
- However, they can be more expensive than other coatings and may require a primer in certain applications.
- Polyurethane Coatings:
- Polyurethane coatings provide exceptional durability and impact resistance.
- They're resistant to chemicals and can be applied in a wide range of temperatures.
- However, they tend to be more expensive and may require professional installation.
- Asphalt Emulsion Coatings:
- Asphalt emulsion coatings are cost-effective and easy to apply.
- They provide good waterproofing and UV protection.
- However, they may not be as durable as other coatings and may require more frequent maintenance.
Understanding the characteristics and trade-offs of each coating option will help you make an informed decision when choosing the right roof coating for your needs.
Factors to Consider: Climate, Material
Considering the climate and material of your roof is crucial when selecting the appropriate roof coating for optimal performance and longevity.
Climate considerations play a significant role in determining the type of coating that will perform best in your specific location. For instance, if you live in an area with high heat and intense sunlight, you may want to choose a roof coating that has excellent UV resistance to prevent premature deterioration.
On the other hand, if you reside in a region with heavy rainfall or high humidity, selecting a coating with superior waterproofing capabilities is essential to protect your roof from leaks and water damage.
Additionally, material selection is another vital factor to consider. Different roof materials, such as metal, asphalt, or concrete, require specific types of coatings to ensure proper adhesion and compatibility.
Preparing Your Roof for Coating
Before applying a roof coating, it's crucial to prepare the surface properly. This involves cleaning the roof to remove any dirt, debris, and loose materials.
Additionally, any damage or leaks should be repaired before proceeding with the coating application. Taking the time to properly prepare your roof will ensure that the coating adheres effectively and provides maximum protection.
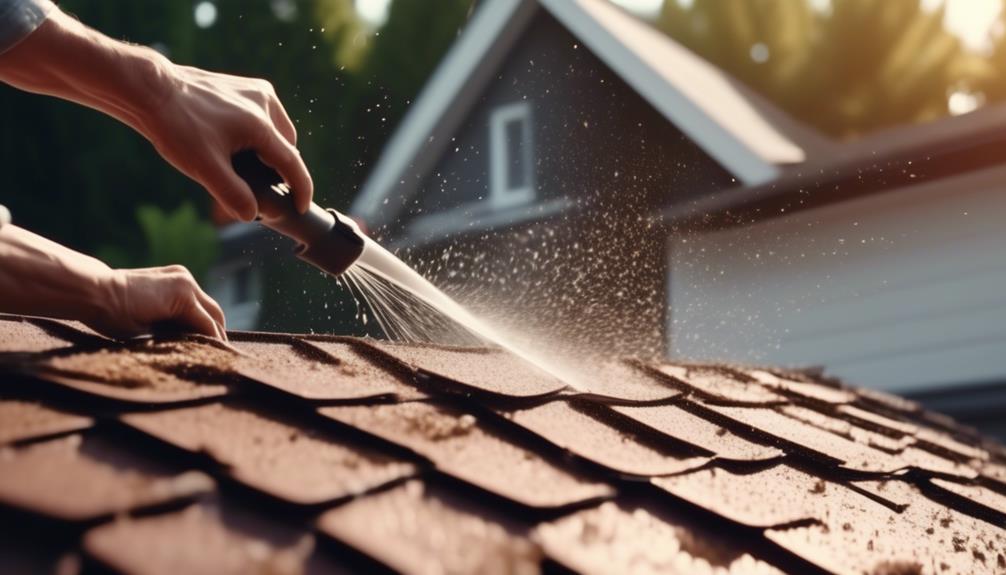
Cleaning the Surface
We highly recommend thoroughly cleaning the surface of your roof before applying any coatings, as it ensures proper adhesion and long-lasting results. Here are some effective cleaning techniques for roof surface preparation:
- Remove debris: Start by removing any loose debris such as leaves, branches, and dirt from the roof. This can be done using a broom or a leaf blower.
- Power washing: For a more thorough cleaning, consider using a power washer. This can help remove stubborn stains, algae, and moss from the roof surface.
- Use a roof cleaner: Apply a specialized roof cleaner to remove any remaining dirt, grime, or mold. Follow the manufacturer's instructions for the best results.
- Scrubbing: In areas with heavy buildup, use a scrub brush or a soft bristle brush to scrub away the dirt. This will ensure a clean and smooth surface for the coating to adhere to.
Repairing Any Damage
What steps should be taken to repair any damage before applying a roof coating?
Before applying a roof coating, it's crucial to thoroughly inspect and repair any existing roof damage. Neglecting to address these issues can lead to further deterioration and compromise the effectiveness of the coating. Here are the essential steps to follow for repairing any damage:
- Identify the Damage: Carefully examine the roof for signs of leaks, cracks, or any other visible damage.
- Address Leaks: Locate the source of the leak and repair it using appropriate sealants or patches.
- Fix Cracks and Punctures: Fill in cracks and punctures with roof sealant or roofing cement.
- Replace Damaged Shingles: Replace any missing or damaged shingles to ensure a uniform and solid surface.
- Reinforce Weak Areas: Strengthen weak areas by applying additional layers of roofing materials or reinforcing with roofing tape.
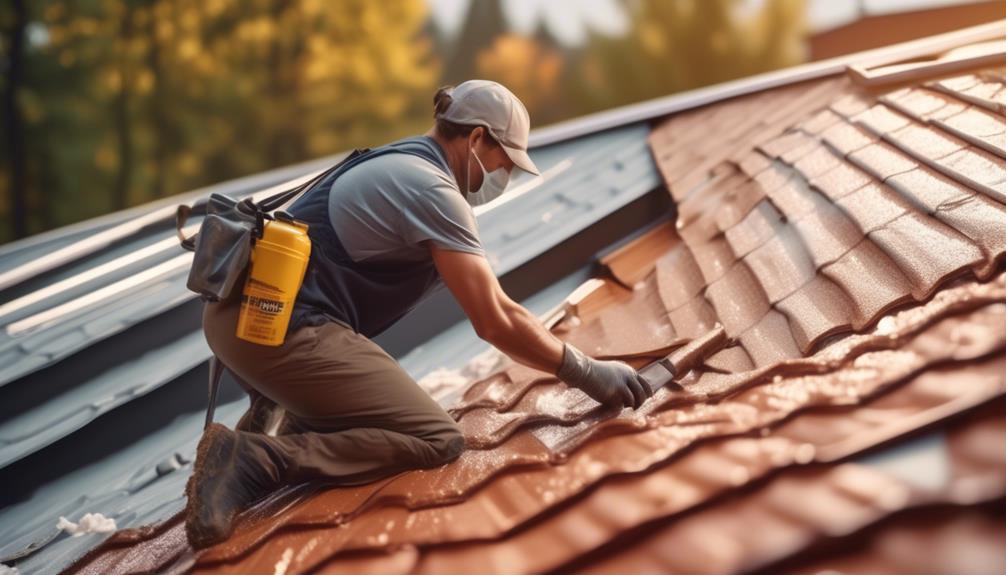
Applying the Roof Coating
To ensure a successful application of the roof coating, it's crucial to prepare the surface thoroughly. Proper surface preparation ensures maximum adhesion and longevity of the coating. Here are some key steps and best practices for applying roof coatings:
- Clean the surface: Remove any debris, dirt, or loose materials from the roof. Use a broom or a pressure washer to clean the surface effectively. This step ensures that the coating adheres properly to the substrate.
- Repair any damage: Before applying the coating, address any existing damage on the roof. Fix leaks, cracks, or any other issues to prevent further damage and ensure a smooth coating application.
- Prime the surface: Applying a primer helps improve adhesion and enhances the performance of the roof coating. Choose a primer suitable for your roofing material and make sure to apply it evenly.
- Apply the coating: Use a brush, roller, or sprayer to apply the roof coating evenly. Start from one end and work your way towards the other, ensuring complete coverage. Follow the manufacturer's instructions regarding the number of coats and drying times.
Maintenance Tips for Long-lasting Results

After properly applying the roof coating, it's essential to follow these maintenance tips to ensure long-lasting results. By implementing these roof coating application techniques and cost-effective maintenance strategies, you can extend the lifespan of your roof while maximizing its performance.
Firstly, regular inspections are crucial for identifying any potential issues before they escalate into larger problems. Conduct visual inspections at least twice a year, paying close attention to seams, fasteners, and areas with heavy foot traffic. Additionally, inspect your roof after extreme weather events to check for any damage.
Secondly, keep your roof clean and free of debris. Regularly remove leaves, branches, and other debris that may accumulate on the surface. This will prevent moisture buildup and the growth of mold or algae. Avoid using harsh cleaning agents or power washing, as they can damage the roof coating.
Thirdly, address any repairs promptly. If you notice any signs of damage or deterioration, such as cracks or blistering, take immediate action to repair them. Ignoring these issues can lead to further damage and compromise the effectiveness of the roof coating.
Lastly, consider applying a maintenance coat every few years to refresh and reinforce the existing roof coating. This will help maintain its protective properties and enhance its longevity.
Common Mistakes to Avoid in DIY Roof Coating
One common mistake to avoid in DIY roof coating is neglecting proper surface preparation. Many homeowners underestimate the importance of this step, but it's essential for achieving long-lasting results.
Here are four other common mistakes to avoid when attempting a DIY roof coating:
- Choosing the wrong type of coating: It's crucial to select the right type of coating for your specific roof material. Different coatings are designed for different surfaces, such as asphalt shingles, metal roofs, or flat roofs. Using the wrong coating can lead to poor adhesion and ineffective protection.
- Inadequate cleaning: Before applying the coating, it's vital to thoroughly clean the roof surface. This includes removing any dirt, debris, or moss. Failing to do so can prevent proper adhesion and compromise the coating's effectiveness.
- Incorrect application: Applying the coating too thickly or too thinly can result in an uneven finish and inadequate protection. It's essential to follow the manufacturer's instructions and apply the coating evenly and at the recommended thickness.
- Ignoring weather conditions: It's crucial to check the weather forecast before starting your DIY roof coating project. Coatings should be applied during dry and mild weather conditions to ensure proper curing and adhesion. Avoid coating your roof during rainy or extremely hot and humid days.
Frequently Asked Questions
Can I Use a DIY Roof Coating on Any Type of Roof?
We've tried it all, from shingles to metal, and let me tell you, not all roofs are created equal.
While DIY roof coatings can be a tempting option, it's important to consider the pros and cons.
While it may save you some money upfront, it's crucial to ensure that the coating is compatible with your specific roof type.
Hiring a professional for roof coating application can provide the expertise needed to ensure long-lasting protection and avoid any potential complications down the road.
How Long Does a DIY Roof Coating Typically Last?
A DIY roof coating typically lasts an average lifespan of around 5 to 10 years, depending on various factors such as climate and maintenance.
Regular maintenance is crucial to ensure its longevity. By inspecting and cleaning the roof regularly, you can prevent any potential issues and extend the coating's lifespan.
It's recommended to reapply a new coat every few years, or as needed, to maintain the effectiveness of the coating and protect your roof from damage.
Can I Apply a DIY Roof Coating Over Existing Roof Shingles?
Yes, we can apply a DIY roof coating over existing roof shingles. It's a cost-effective way to extend the life of your roof and provide added protection against leaks and damage.
However, it's important to properly prepare the surface and choose the right type of coating for the specific material of your roof, whether it's clay tiles or metal.
Following the correct application techniques and using high-quality products will ensure a long-lasting and effective coating.
What Safety Precautions Should I Take When Applying a DIY Roof Coating?
When applying a DIY roof coating, it's crucial to prioritize safety. Roof coating application safety precautions should always be followed to minimize risks.
We recommend wearing protective gear such as gloves, safety goggles, and a respirator to protect against chemicals and fumes.
Additionally, make sure the roof surface is clean and dry to prevent slips and falls.
Taking these safety measures ensures a safe and successful DIY roof coating application.
Are DIY Roof Coatings Resistant to UV Rays?
Yes, DIY roof coatings can be resistant to UV rays. It's important to choose a coating that has UV protection properties. When applying a DIY roof coating, it's crucial to follow proper application techniques to ensure maximum UV resistance.
However, it's worth noting that professional roof coating services often provide more durable and long-lasting protection against UV rays, due to their expertise and use of high-quality materials.