
When it comes to keeping our homes safe and secure, the roof plays a crucial role as our first line of defense against the elements. Like a sturdy shield, it shields us from the rain, wind, and blazing sun.
However, just like any shield, it can suffer wear and tear over time. That's why it's essential to regularly inspect our roofs to catch any potential problems before they escalate into costly repairs or even worse, leaks.
In this discussion, we will uncover the 5 best DIY tips for roof inspection that will help you ensure the longevity and integrity of your roof. From safety precautions to common problems to look out for, we've got you covered.
So grab your metaphorical magnifying glass and let's embark on this roof inspection journey together.
Key Takeaways
- Choose the right ladder and ensure its stability for a safe DIY roof inspection
- Inspect shingles for signs of wear and tear, such as curling or cracking
- Check flashing around chimneys, vents, and skylights for damage
- Regularly clean and maintain the roof to prolong its lifespan and prevent costly repairs.
Safety Precautions for DIY Roof Inspection

To ensure a safe and successful DIY roof inspection, we must prioritize the implementation of key safety precautions. When it comes to ladder safety, it's crucial to choose the right ladder for the job and ensure its stability. Use a ladder that's long enough to reach the roof comfortably, and make sure it's in good condition, with no loose or damaged parts. Set up the ladder on a stable and level surface, preferably with someone holding it steady from the bottom.
In addition to ladder safety, wearing the appropriate protective gear is vital for a DIY roof inspection. Start by wearing a hard hat to protect your head from falling debris. Safety glasses are also essential to shield your eyes from any flying particles or dust. It's recommended to wear long sleeves and pants to protect your skin from scratches and the sun's rays. Non-slip shoes are important to prevent any accidents while walking on the roof. Lastly, don't forget to use sunscreen to protect your skin from harmful UV rays.
Prioritizing ladder safety and wearing the necessary protective gear are fundamental precautions to take when conducting a DIY roof inspection. By following these guidelines, you can ensure your safety while effectively assessing the condition of your roof.
Identifying Common Roof Problems
After ensuring ladder safety and donning the necessary protective gear, we can now move on to identifying common roof problems during a DIY inspection. It's essential to be thorough and observant to catch any signs of roof damage or potential leaks. Here are three key areas to focus on when inspecting your roof:
- Shingles: Inspect the condition of the shingles by looking for signs of wear and tear, such as curling, cracking, or missing pieces. Pay attention to any areas where the shingles appear discolored or have granule loss, as these could indicate underlying issues.
- Flashing: Check the flashing around chimneys, vents, and skylights for signs of damage or deterioration. Damaged flashing can lead to water penetration and subsequent leaks, so it's crucial to address any issues promptly.
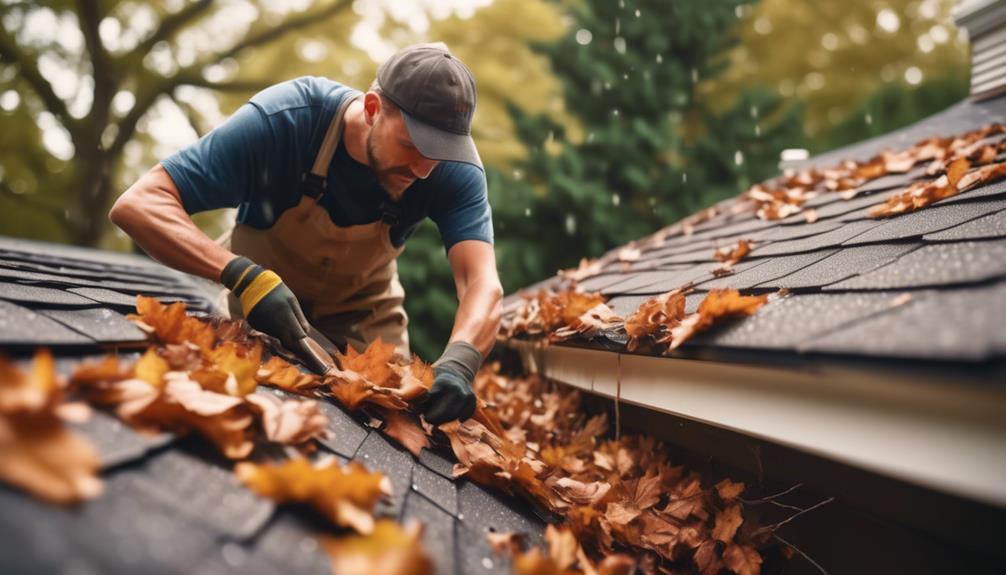
- Gutters and Downspouts: Examine the gutters and downspouts for debris buildup or sagging. Clogged gutters can cause water to overflow and seep into the roof, leading to damage over time. Ensure that the downspouts are securely attached and directing water away from the foundation.
Tools Needed for a Thorough Roof Inspection

During a thorough roof inspection, it is essential to have the right tools to accurately assess the condition of your roof. The use of proper roof inspection tools is crucial in identifying any potential issues and ensuring the overall maintenance of your roof. Here is a list of the most important tools you will need for a comprehensive roof inspection:
| Tool | Description | Importance |
|---|---|---|
| Ladder | Allows access to the roof surface | Essential for safe inspection |
| Flashlight | Provides illumination in dark or shaded areas | Helps in detecting hidden damage |
| Binoculars | Enables close-up inspection from the ground | Useful for assessing hard-to-reach areas |
| Tape Measure | Measures dimensions and distances | Helps in determining accurate roof size |
| Roofing Hammer | Used for tapping and testing the stability of shingles | Assists in identifying loose or damaged areas |
Having these tools on hand will allow you to thoroughly inspect your roof, identify any potential problems, and take appropriate measures to maintain its integrity. Regular roof inspections and maintenance are crucial in preventing costly repairs and ensuring the longevity of your roof. By investing time and effort in roof maintenance, you can extend the lifespan of your roof and avoid expensive repairs down the line. Remember, a well-maintained roof is a key component in protecting your home from the elements and maintaining its structural integrity.
Step-By-Step Guide to Inspecting Your Roof
We will now outline the step-by-step process for conducting a thorough roof inspection to ensure the integrity and maintenance of your roof. It's important to regularly inspect your roof for any signs of damage or wear and tear. By following this roof inspection checklist, you can identify potential issues early on and address them before they become major problems.
- Start by visually inspecting the exterior of your roof. Look for any missing or damaged shingles, cracks, or areas of sagging.
- Next, check the gutters and downspouts for any signs of debris or clogs. Clear them out to prevent water from backing up and causing damage.
- Use binoculars to inspect the flashing around chimneys, vents, and skylights. Look for any signs of rust, corrosion, or gaps.
- Move to the attic and inspect the underside of the roof. Look for any signs of water stains, mold, or dampness.
- Check the insulation for any signs of damage or deterioration. Proper insulation is essential for maintaining a healthy and energy-efficient roof.
- Finally, inspect the interior of your home for any signs of water leaks or damage on the ceiling or walls.
Maintenance Tips for Prolonging Roof Lifespan
To prolong the lifespan of your roof, it's crucial to implement regular maintenance practices that will keep it in optimal condition. Proper roof maintenance not only ensures the longevity of your roof but also prevents costly repairs down the line.
There are two key aspects to consider when it comes to maintaining your roof: roof cleaning techniques and choosing the right roofing materials.
When it comes to roof cleaning techniques, it's important to remove any debris, such as leaves or branches, that may accumulate on your roof. This can be done by using a leaf blower or a soft-bristle brush to gently sweep away the debris. Additionally, moss and algae growth should be addressed promptly to prevent damage to the roof's surface. This can be done by applying a moss-killing solution and gently scrubbing the affected areas.
Choosing the right roofing materials is another essential factor in prolonging your roof's lifespan. It's important to select materials that are durable, weather-resistant, and suited to your specific climate. Factors such as the slope of your roof, the amount of rainfall in your area, and the overall aesthetic you desire should all be considered when choosing roofing materials.
Frequently Asked Questions
How Often Should I Inspect My Roof?
We believe that regular roof inspections are crucial to maintaining the integrity of your home.
It's often said that 'an ounce of prevention is worth a pound of cure,' and this rings true when it comes to your roof.
The frequency of roof inspections depends on various factors, such as the age of your roof and the climate you live in.
However, a general rule of thumb is to inspect your roof at least once a year, using proper tools to ensure a thorough examination.
Can I Use a Ladder to Inspect My Roof, or Do I Need Specialized Equipment?
Using a ladder for roof inspection has its pros and cons. It allows us to access different areas easily, but it can be risky and may not provide a complete view of the roof.
Alternatively, we can use binoculars or a drone to inspect hard-to-reach areas.
Walking on the roof is another option, but it should be done carefully to avoid damaging the shingles.
Regular inspections are crucial in identifying any issues and ensuring the longevity of the roof.
What Are the Signs of a Roof Leak?
When it comes to roof leak detection, there are several signs to look out for.
One common indicator is water stains on the ceiling or walls, which may appear as dark spots or discoloration.
You might also notice drips or puddles forming inside your home during rainfall.
Other signs include mold or mildew growth, warped or peeling paint, or a musty odor in your attic.
These issues can be caused by damaged or missing shingles, clogged gutters, or faulty flashing.
Regular inspection and maintenance can help prevent roof leaks.
Are There Any Specific Areas of the Roof That Are More Prone to Problems?
When it comes to areas prone to roof problems, there are a few common issues that homeowners should keep an eye on.
One area that often experiences problems is the flashing, which is the metal strip that seals the joints and edges of the roof.
Other areas to inspect include the gutters, where clogging can lead to water damage, and the shingles, which can become loose or damaged over time.
Regular inspection and maintenance of these areas can help prevent bigger problems down the road.
Can I Repair Minor Roof Issues Myself, or Should I Hire a Professional?
We have experience with DIY roof repair and hiring professionals.
When it comes to minor roof issues, it's possible to handle them yourself. However, it's crucial to have the necessary knowledge and tools.
If you don't feel confident in your abilities or if the issue seems more complex, it's wise to hire a professional. They've the expertise to identify underlying problems and provide long-term solutions.
Safety should always be a priority when working on your roof.

