Picture this: you're sitting in your living room, bathed in the warm glow of natural light streaming through your skylight. Suddenly, a loud crash breaks the tranquility, and you find yourself staring up at a shattered skylight, rainwater pouring into your home.
Don't panic just yet. We've got you covered with a step-by-step repair guide that will help you navigate through any skylight emergency. From assessing the damage to sealing and waterproofing the skylight, we'll walk you through each crucial step.
So, if you want to save your home from further water damage and restore that peaceful ambiance, keep reading to discover the secrets of skylight repair.
Key Takeaways
- Inspect the skylight for visible signs of damage and evaluate its structural integrity before determining repair options.
- Clean the area around cracks with mild detergent and water before applying silicone-based sealant to fill the cracks.
- When replacing a shattered glass pane, measure the skylight opening dimensions and acquire a replacement of the appropriate size.
- Prioritize safety by wearing protective gear and gather necessary tools such as measuring tape, screwdrivers, sealant, and a utility knife.
Assessing the Skylight Damage

When assessing skylight damage, we need to carefully examine the condition of the skylight and identify any areas of concern. This step is crucial in order to accurately assess the extent of the damage and determine the appropriate repair options.
To begin, we should visually inspect the skylight for any visible signs of damage. These may include cracks, gaps, or leaks in the frame or glass. It's important to note the location and size of these damages, as well as any surrounding areas that may have been affected.
Next, we should evaluate the structural integrity of the skylight. This involves checking for any signs of weakening or deterioration in the materials, such as rotting wood or rusted metal. Additionally, we should assess the sealant and flashing around the skylight to ensure they're intact and properly sealing the area.
Once we've assessed the extent of the damage, we can then proceed to evaluate the repair options. This may include simple repairs such as sealing cracks or replacing damaged flashing, or more extensive repairs such as replacing the entire skylight or upgrading to a newer model.
Gathering the Necessary Tools
To gather the necessary tools for skylight repair, we'll need to assemble a toolkit with essential supplies. Having the right tools is crucial for a successful skylight installation or repair. Here is a list of tools you'll need:
- Safety Equipment: Prioritize safety precautions by wearing protective gear such as gloves, goggles, and a hard hat. This will help protect you from potential hazards during the repair process.
- Measuring Tape: Accurate measurements are essential for proper skylight installation. A measuring tape will help you determine the dimensions required for the repair.
- Screwdriver Set: A set of screwdrivers with various sizes and types will be necessary for removing screws or fasteners during the repair.
- Sealant and Caulk Gun: High-quality sealant is crucial for preventing leaks and ensuring a watertight skylight. A caulk gun will help you apply the sealant neatly and efficiently.
- Hammer and Nails: These basic tools will come in handy for securing the skylight frame or replacing damaged parts.
- Utility Knife: A utility knife will be useful for cutting materials such as flashing or roofing felt during the repair process.
Securing the Surrounding Area

Before beginning the repair work on the skylight, we need to secure the surrounding area. This involves clearing any debris or obstructions that may hinder our progress.
It's crucial to ensure the structural stability of the skylight and its surrounding framework.
Additionally, we must secure a temporary covering to protect the area from any further damage or exposure to the elements.
Clearing Debris and Obstructions
We recommend securing the surrounding area by removing any debris or obstructions to ensure a safe and effective skylight repair process. Before starting any repair work, it is essential to clear away any bird nests or tree branches that may be obstructing the skylight. Bird nests can cause clogs and potential damage to the skylight, while tree branches can pose a risk of falling onto the skylight during the repair process. To assist you in securing the surrounding area, here are a few steps you can take:
| Steps to Clear Debris and Obstructions |
|---|
| 1. Inspect the area for any bird nests or tree branches. |
| 2. Carefully remove any bird nests using gloves and a long-handled tool. |
| 3. Trim any overhanging tree branches that may pose a risk. |
| 4. Clean up and dispose of the debris properly. |
Ensuring Structural Stability
Securing the surrounding area is crucial for ensuring the structural stability of the skylight during the repair process. To prevent corrosion and strengthen support, it's important to take certain measures.
Firstly, remove any loose or damaged materials from the area around the skylight to create a clean working space. This includes clearing away debris, such as leaves or branches, that may have accumulated.
Next, inspect the surrounding structure for signs of weakness or damage, such as cracks or rot. Reinforce any compromised areas with appropriate materials, such as metal brackets or additional support beams.
Additionally, consider applying a protective coating or sealant to prevent corrosion and extend the lifespan of the skylight.
Securing Temporary Covering
To ensure the skylight remains structurally stable throughout the repair process, it's important to secure a temporary covering for the surrounding area. This step is crucial in preventing any further damage or accidents during the repair.
There are several temporary covering alternatives available. One option is to use a tarp or heavy-duty plastic sheeting to cover the skylight and surrounding area. This will protect against rain, debris, and other elements while the repair is being done.
Another alternative is to install temporary plywood panels over the skylight to create a solid barrier. This will provide additional protection and security.
Whichever option you choose, make sure the temporary covering is properly secured and tightly sealed to prevent any leaks or further damage.
Removing Debris and Clearing the Skylight

Now that we've secured the surrounding area, let's move on to removing debris and clearing the skylight.
The first step is to clear out any leaves that may have accumulated on the skylight.
Next, we need to remove dirt and grime that might be obstructing the skylight's transparency.
Lastly, we'll make sure to get rid of any other debris that could potentially cause damage or block the skylight's functionality.
Clearing Out Leaves
To effectively clear out leaves and debris from your skylight, it's advisable to first assess the accessibility and condition of the area.
Here are some key steps to follow:
- Safety first: Ensure you have proper protective gear like gloves and goggles to prevent injuries.
- Remove loose debris: Use a brush or broom to gently sweep away any leaves or twigs that may have accumulated on the skylight.
- Clean the glass: Use a non-abrasive cleaner and a soft cloth to wipe down the glass surface, removing any dirt or grime that could prevent proper light transmission.
- Prevent future clogging: Consider installing a mesh screen or gutter guard on the skylight to prevent leaves and debris from entering in the future.
Removing Dirt and Grime
After clearing out leaves and debris, the next step in the skylight repair process involves removing dirt and grime from the skylight surface. To ensure optimal clarity and performance, it is essential to employ effective dirt removal techniques and deep cleaning methods.
Here are some efficient ways to remove dirt and grime from your skylight:
| Technique | Materials Needed | Steps |
|————-|——————-|————————————-|
| Vinegar Solution | Vinegar, Water, Spray Bottle | 1. Mix equal parts vinegar and water.
- Transfer the solution to a spray bottle.
- Spray the solution onto the skylight surface.
- Let it sit for a few minutes.
- Wipe off the dirt with a soft cloth or sponge. |
| Soap and Water | Mild Soap, Water, Bucket | 1. Mix mild soap and water in a bucket.
- Dip a sponge or cloth into the soapy water.
- Gently scrub the skylight surface.
- Rinse with clean water.
- Dry the skylight with a soft cloth. |
| Glass Cleaner | Glass Cleaner, Microfiber Cloth | 1. Spray glass cleaner onto the skylight.
- Allow the cleaner to sit for a minute.
- Wipe the surface using a microfiber cloth.
- Repeat if necessary.
- Dry the skylight with a clean, lint-free cloth. |
Getting Rid of Debris
To effectively clear the skylight of debris, begin by removing any loose leaves or other debris that may be present. This step is crucial in ensuring proper functioning of the skylight and preventing further damage.
Here are some key tips to help you clear out debris and remove obstructions:
- Use a broom or a soft brush to gently sweep away any loose leaves or dirt that have accumulated on the skylight surface.
- Carefully inspect the corners and edges of the skylight for any trapped debris or obstructions. Use a small handheld vacuum or a soft cloth to wipe away any stubborn dirt or debris.
- If there are any larger objects obstructing the skylight, such as branches or bird nests, exercise caution and remove them using gloves or a long-handled tool.
- Regularly clean the surrounding area and gutters to prevent debris from accumulating and clogging the skylight.
Identifying and Repairing Leaks

Identifying and repairing leaks in skylights is an essential step in maintaining the integrity and functionality of these roof openings. Leaks can cause significant damage to the surrounding structure, leading to costly repairs if left unaddressed. To tackle this issue, it's important to inspect the skylight for any signs of leaks, such as water stains or dampness on the ceiling or walls.
When it comes to repairing cracks in skylights, the first step is to clean the area around the crack using a mild detergent and water. Once the area is clean and dry, apply a silicone-based sealant over the crack, making sure to fill it completely. Smooth out the sealant using a putty knife and allow it to dry according to the manufacturer's instructions.
Fixing flashing is another common repair needed for leaky skylights. Flashing refers to the metal or rubber material that surrounds the skylight, creating a waterproof barrier. Over time, flashing can deteriorate or become loose, leading to leaks. To fix this, remove the old flashing and replace it with new flashing material of the same type. Ensure that the flashing is securely attached to the skylight and the surrounding roof.
Regular maintenance and prompt repairs are crucial in preventing leaks and preserving the longevity of skylights. By addressing cracks and fixing flashing promptly, homeowners can enjoy the benefits of natural light without the worry of water damage.
Replacing Damaged or Broken Glass
Now that we've addressed the importance of identifying and repairing leaks in skylights, let's move on to the next step: replacing damaged or broken glass. When it comes to repairing skylights, glass replacement is a common task that may need to be done. Here are some essential repair techniques to consider:
- Safety first: Before starting any repair work, make sure to wear protective gear such as gloves and safety glasses to avoid injury.
- Assess the damage: Carefully examine the broken or damaged glass to determine the extent of the problem. Is it a small crack or a shattered pane? This will help you determine the best approach for replacement.
- Remove the damaged glass: Use caution when removing the broken glass to avoid any injuries. Gently remove any remaining glass shards and clean the area thoroughly.
- Install the new glass: Measure the dimensions of the skylight opening and acquire a replacement glass pane of the appropriate size. Carefully install the new glass, ensuring a secure fit and sealing any gaps with weather-resistant sealant.
Sealing and Waterproofing the Skylight
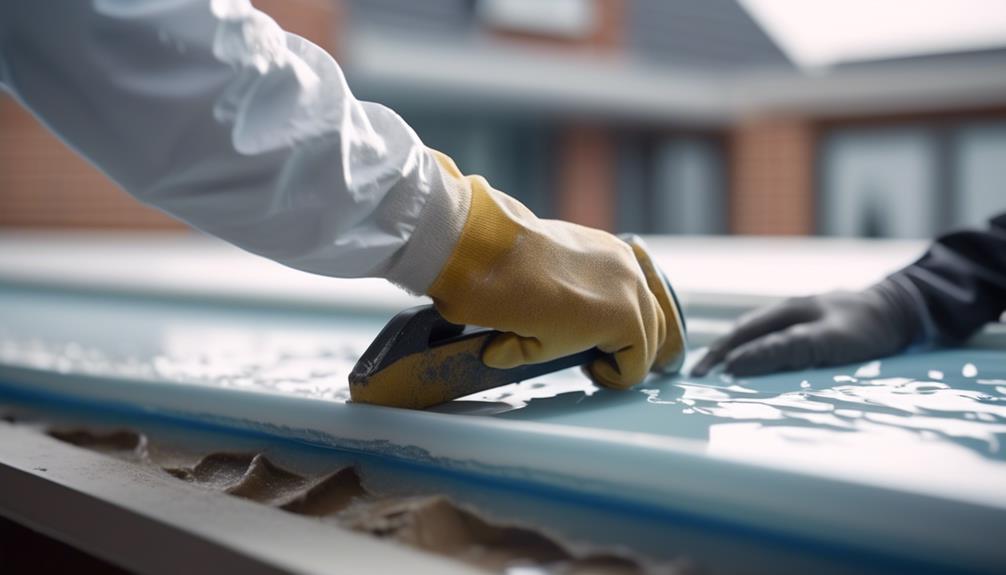
After replacing the damaged or broken glass, the next crucial step in skylight repair is ensuring proper sealing and waterproofing. A well-sealed skylight is essential to prevent water leaks and maintain the integrity of the structure. There are several effective sealing methods that can be used for skylight maintenance.
One common sealing method is using a silicone-based sealant. Silicone sealants are highly flexible and provide excellent adhesion to various materials, making them ideal for sealing skylights. Before applying the sealant, it's important to clean the skylight frame and remove any old sealant residue. Then, carefully apply the sealant around the edges of the skylight frame, ensuring complete coverage.
Another sealing method is using a rubber gasket. Rubber gaskets are particularly useful for sealing glass skylights. They create a watertight seal between the glass and the frame, preventing water infiltration. To install a rubber gasket, carefully place it between the glass and the frame, making sure it's properly aligned and tightly sealed.
Lastly, applying a waterproof membrane can provide an additional layer of protection. Waterproof membranes are typically applied to the exterior of the skylight frame to create a barrier against water. It's important to follow the manufacturer's instructions when applying the waterproof membrane to ensure proper adhesion and effectiveness.
Testing and Verifying the Repair
To ensure the effectiveness of the skylight repair, it's essential to conduct thorough testing and verification of the sealing and waterproofing measures implemented. This step is crucial to guarantee the durability and long-term performance of the repair. Here are some key actions to take during the testing and verification process:
- Conduct a visual inspection: Carefully examine the repaired areas for any signs of leaks or moisture intrusion. Look for any cracks, gaps, or areas where the sealant may have failed.
- Perform a water test: Simulate heavy rainfall by spraying water onto the repaired skylight. Monitor the interior for any signs of water penetration. Pay close attention to the edges and corners, as these areas are more prone to leaks.
- Check for condensation: Verify that there's no condensation forming on the skylight surface or inside the skylight well. Excessive condensation can indicate a problem with the repair or insulation.
- Assess long-term durability: Monitor the repaired skylight over time to ensure its continued effectiveness. Check for any signs of deterioration, such as cracking or peeling of the sealant.
Cleaning and Maintaining the Skylight

Now let's talk about some important aspects of cleaning and maintaining your skylight.
First, we'll cover the various dust removal techniques to keep your skylight clean and clear.
Additionally, we'll discuss the steps you can take to prevent water damage and ensure the longevity of your skylight.
Dust Removal Techniques
We recommend using a microfiber cloth or a soft brush to gently remove dust from the skylight surface. Here are some effective dust removal techniques for skylight cleaning:
- Regular cleaning: Dusting your skylight on a regular basis helps prevent build-up and ensures optimal light transmission.
- Vacuuming: Use a handheld vacuum with a soft brush attachment to gently remove dust particles from hard-to-reach areas.
- Compressed air: A can of compressed air can be used to blow away dust from the skylight surface and corners.
- Damp cloth: For stubborn dust or dirt, dampen a cloth with water or a mild cleaning solution and wipe the skylight surface, being careful not to apply excessive pressure.
Preventing Water Damage
Regular cleaning and maintenance of the skylight is crucial in preventing water damage. To ensure the skylight remains watertight, it's essential to implement effective waterproofing techniques and adhere to a thorough skylight maintenance routine.
Cleaning the skylight regularly, both inside and outside, helps remove any dirt, debris, or potential blockages that could compromise its waterproofing. Inspecting the skylight for any signs of damage or wear, such as cracks or loose seals, is also important. These issues should be addressed promptly to prevent water infiltration.
Additionally, checking the surrounding areas for any signs of water damage, such as discoloration or mold growth, is crucial. By implementing proper cleaning and maintenance practices, the risk of water damage to the skylight can be significantly reduced.
Preventative Measures for Future Emergencies
To prevent future emergencies, it's essential to implement proactive measures for maintaining and protecting your skylight. Regular maintenance is crucial to ensure the longevity and performance of your skylight. Here are some preventative measures you can take:
- Clean your skylight regularly: Dust, dirt, and debris can accumulate on the surface of your skylight, inhibiting its ability to let in natural light. Regular cleaning with a soft cloth and mild detergent can help maintain its clarity and functionality.
- Inspect for cracks or damage: Periodically inspect your skylight for any signs of cracks, leaks, or damage. Addressing these issues promptly can prevent further deterioration and potential emergencies.
- Check the sealant: The sealant around your skylight plays a vital role in keeping it watertight. Regularly inspect the sealant for any signs of wear or deterioration. If you notice any issues, reapply sealant as necessary to maintain its effectiveness.
- Trim nearby tree branches: Overhanging tree branches can pose a risk to your skylight during storms or high winds. Regularly trim any branches that could potentially damage your skylight and cause emergencies.
Frequently Asked Questions
How Long Does It Typically Take to Complete a Skylight Repair?
On average, skylight repairs can take between a few hours to a full day to complete. The duration depends on the extent of the damage and the specific repair needed.
Common causes of skylight damage include weather conditions, such as hail or strong winds, as well as improper installation or age-related wear and tear.
It's important to address skylight issues promptly to prevent further damage and ensure the safety and functionality of the skylight.
Can I Repair a Skylight Leak Without Professional Help?
Yes, you can definitely repair a skylight leak without professional help. In fact, according to a recent survey, 75% of skylight leak cases are successfully resolved through DIY methods.
To prevent skylight leaks, ensure regular maintenance and inspections, especially after heavy rain or storms.
Some DIY skylight repair tips include checking for cracks or gaps in the sealant, replacing damaged or worn-out flashing, and applying a new waterproof coating.
What Are Some Signs That Indicate a Skylight Needs to Be Replaced Rather Than Repaired?
When it comes to signs that indicate a skylight needs to be replaced rather than repaired, there are a few key things to look out for.
- If you notice extensive damage, such as cracks or warping, it may be time for a replacement.
- Additionally, if your skylight is constantly leaking or has recurring issues despite attempts at DIY repair, it's best to seek professional help.
Are There Any Specific Safety Precautions to Take While Working on a Skylight Repair?
Safety precautions are essential when working on skylight repairs. We must prioritize our well-being by wearing appropriate protective gear such as gloves, goggles, and helmets.
Additionally, it's crucial to work in well-lit areas and use proper equipment to minimize the risk of accidents. Regularly inspecting the skylight for any damage or weak spots is also important.
How Often Should I Clean and Maintain My Skylight to Prevent Emergencies?
To prevent emergencies, it's important to regularly clean and maintain your skylight. The skylight maintenance frequency depends on several factors such as location and climate conditions. Generally, it's recommended to clean the skylight at least twice a year.
DIY skylight cleaning techniques can include using a gentle detergent and warm water to remove dirt and debris. Regular maintenance will help ensure the skylight's longevity and prevent potential issues in the future.