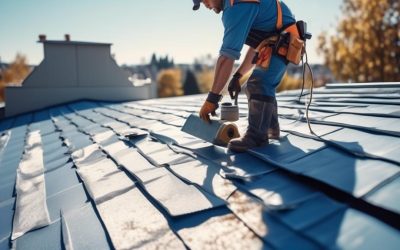
So, imagine this: you're enjoying a peaceful evening at home when suddenly, you hear the dreaded sound of dripping water. You rush to investigate, only to find that your flat roof has sprung a leak.
Don't panic just yet! We've got you covered with our 10 essential DIY flat roof repair hacks. From patching small holes to reinforcing weak areas, we'll show you how to tackle common roof issues on your own.
But that's not all – we've also got some preventive maintenance tips up our sleeve to help you avoid future headaches.
So, if you're ready to take control of your roof's health and save some money in the process, stick around. You won't want to miss these game-changing hacks.
Key Takeaways
- Regularly inspecting and repairing flashing around the chimney can help prevent roof leaks.
- When repairing damaged shingles, make sure to use the right tools and choose replacement shingles that match the existing ones.
- Properly sealing roof seams with the right sealant and regularly maintaining them can help prevent water damage.
- Regularly cleaning and clearing gutters is important to prevent clogs, water damage, and potential leaks.
Identifying Roof Leaks

When it comes to identifying roof leaks, it's essential to conduct a thorough inspection to pinpoint the exact source of the problem. One common area where leaks occur is around the chimney. Over time, the flashing around the chimney can deteriorate, leading to water seepage. To repair chimney leaks, start by examining the flashing for any signs of damage or corrosion. Look for cracks, gaps, or loose sections that may be allowing water to enter. If any issues are found, remove the old flashing and replace it with new, watertight flashing.
Additionally, inspect the chimney for any cracks or missing mortar that may be contributing to the leak. Use mortar to fill in any gaps and create a solid seal.
Another important aspect of identifying roof leaks is understanding various leak detection techniques. These techniques include visually inspecting the roof for any signs of damage, such as missing or broken shingles, as well as checking for water stains or discoloration on the ceiling or walls inside the home. It's also helpful to use a hose to simulate rain and observe how the water flows on the roof.
Patching Small Holes
When it comes to patching small holes on a flat roof, there are two effective methods that can be used: caulking and roofing cement.
Caulking is a popular choice for small holes and cracks as it provides a flexible and waterproof seal.
Roofing cement, on the other hand, is a thicker material that can be applied with a trowel or putty knife to fill in larger holes and gaps.
Both methods are relatively easy to use and can help prevent further damage to your flat roof.
Caulking for Small Holes
To effectively patch small holes on your flat roof, consider utilizing a high-quality caulking product. Caulking is an essential technique that can help seal and protect your roof from further damage.
When it comes to caulking for small holes, there are a few key factors to keep in mind. First, make sure to choose a caulking product that's specifically designed for roofing applications. This will ensure that it has the necessary durability and flexibility to withstand the harsh outdoor conditions.
Additionally, you'll need to use the right caulking tools for the job. A caulking gun is the most common tool used for applying caulk. It allows for precise control and even distribution of the caulking material.
Remember to clean the area around the hole thoroughly before applying the caulk to ensure proper adhesion.
Patching With Roofing Cement
After successfully caulking small holes on your flat roof, the next step is to patch them using roofing cement. Patching with roofing cement is an effective solution for repairing minor damages and preventing further leaks. This process is a crucial part of flat roof maintenance and can be easily done as a DIY roof repair project.
To begin, gather the necessary materials, including roofing cement, a trowel, and a putty knife. Ensure that the area around the hole is clean and debris-free. Apply a generous amount of roofing cement to the hole, using the putty knife to spread it evenly. Make sure to cover the entire hole and extend the patch beyond the damaged area for added protection.
Smooth out the patch with the trowel, ensuring a seamless finish. Allow the roofing cement to dry completely before inspecting for any additional cracks or holes that may require patching. Regularly inspecting and patching small holes using roofing cement is an essential part of flat roof maintenance and can help prolong the lifespan of your roof.
Fixing Cracked Flashing

When it comes to fixing cracked flashing on a flat roof, there are a few key points to keep in mind.
First, it's important to have the right materials for the repair, such as roofing cement and a metal flashing patch.
Second, proper application techniques are crucial to ensure a secure and long-lasting fix.
Flashing Repair Materials
In order to effectively repair cracked flashing on a flat roof, we recommend utilizing high-quality flashing repair materials. These materials are designed to provide long-lasting durability and ensure proper roof waterproofing. Here are some top-notch options to consider:
- Metal flashing: Made from aluminum or copper, metal flashing is highly resistant to corrosion and provides excellent protection against water infiltration.
- Rubberized asphalt flashing: This type of flashing is flexible and easy to work with, making it ideal for repairing cracked flashing on flat roofs.
- Self-adhesive flashing tape: This convenient option eliminates the need for messy adhesives and provides a watertight seal.
- Polyethylene flashing: This synthetic material is lightweight, durable, and resistant to UV rays, ensuring long-term performance.
- PVC flashing: PVC flashing offers exceptional flexibility and is known for its resistance to chemicals and extreme weather conditions.
Proper Application Techniques
To ensure a successful repair of cracked flashing on a flat roof, it's crucial to carefully apply the chosen flashing repair materials with precision and expertise. Here are a few application tips to help you achieve a professional and long-lasting repair.
Firstly, it's important to clean the cracked area thoroughly before applying any repair materials. Use a wire brush or sandpaper to remove any debris, rust, or loose paint. This will ensure proper adhesion and a smooth finish.
Next, make sure to apply the flashing repair materials evenly and in the recommended thickness. This will prevent any weak spots or uneven surfaces that could lead to future leaks. Follow the manufacturer's instructions for the specific product you're using.
Lastly, one common mistake to avoid is applying too much pressure while spreading the repair materials. This can cause the materials to seep into the cracks and create an uneven surface. Instead, use a gentle, sweeping motion to ensure even coverage.
Preventing Future Cracking
To prevent future cracking of flashing and ensure a durable repair, it's essential to implement effective techniques and materials. Here are some important tips to consider:
- Regular Inspection: Conduct regular inspections of your roof to identify any signs of cracking or damage in the flashing.
- Proper Installation: Ensure that the flashing is properly installed and sealed to prevent water from seeping in and causing damage.
- Use High-Quality Materials: Choose high-quality materials for your flashing that are durable and resistant to cracking.
- Address Water Damage: Promptly address any water damage on your roof to prevent further cracking and deterioration of the flashing.
- Improve Roof Ventilation: Good roof ventilation helps to reduce moisture buildup and prevent the formation of cracks in the flashing.
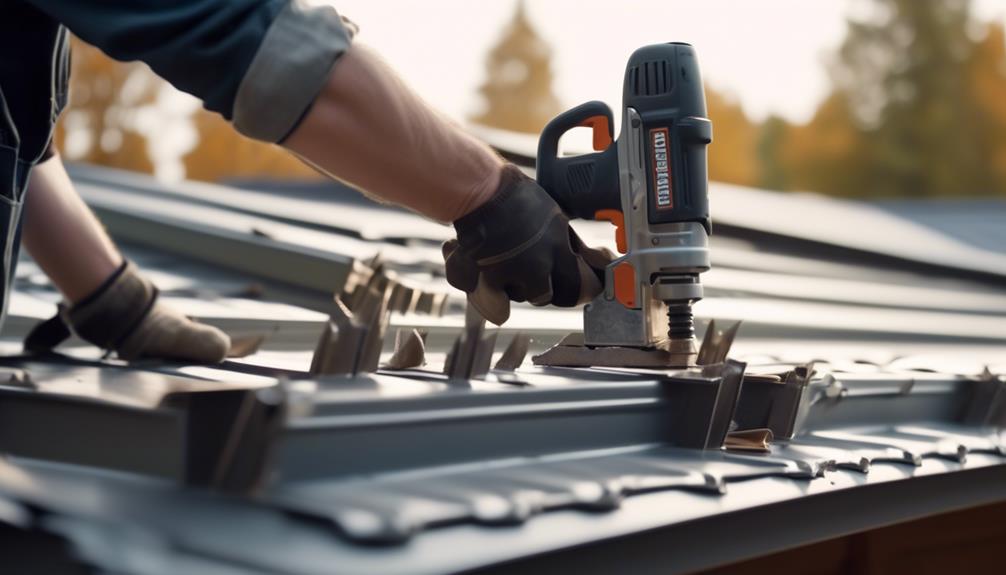
Repairing Damaged Shingles

If you notice damaged shingles on your flat roof, it is imperative to address the issue promptly to prevent further damage and potential leaks. Repairing shingle damage and replacing broken shingles can be a DIY task that saves you time and money. Here are some essential steps to follow:
- Inspect the Damage: Carefully examine the shingles to determine the extent of the damage. Look for cracks, missing pieces, or loose shingles.
- Gather the Necessary Tools: Before starting the repair, gather the tools you'll need, such as a pry bar, roofing nails, a hammer, and replacement shingles.
- Remove Damaged Shingles: Use the pry bar to gently lift the damaged shingle and remove any nails. Be careful not to damage the surrounding shingles.
- Install the Replacement Shingle: Slide the new shingle into place, aligning it with the existing shingles. Secure it with roofing nails in the designated areas.
| Steps to Repair Damaged Shingles |
|---|
| 1. Inspect the Damage |
| 2. Gather the Necessary Tools |
| 3. Remove Damaged Shingles |
| 4. Install the Replacement Shingle |
Remember to choose replacement shingles that match the existing ones in terms of color and material. By addressing damaged shingles promptly, you can maintain the integrity of your flat roof and prevent further issues.
Sealing Roof Seams
After successfully repairing the damaged shingles on your flat roof, the next crucial step is to ensure the roof seams are properly sealed to prevent any potential leaks. Sealing the roof seams is essential for maintaining the integrity of your flat roof and protecting your home from water damage.
Here are five important tips to consider when sealing roof seams as part of your DIY roof repair project:
- Choose the right roof sealant: There are various roof sealants available in the market, such as silicone-based or asphalt-based sealants. Consider the type of roof material and climate conditions to select the most suitable sealant for your flat roof.
- Clean and prepare the roof surface: Before applying the sealant, make sure to clean the roof surface thoroughly. Remove any dirt, debris, or loose materials from the seams to ensure proper adhesion of the sealant.
- Apply the sealant evenly: Use a caulking gun to apply the sealant along the roof seams. Be sure to apply a consistent and even layer of sealant to create a strong and durable seal.
- Inspect for any missed spots: Once the sealant has dried, inspect the roof seams carefully for any missed spots or gaps. Touch up any areas that require additional sealing to ensure complete protection against potential leaks.
- Regular maintenance: Regularly inspect and maintain your sealed roof seams to prevent any future issues. Check for signs of wear or damage and reapply sealant as needed to keep your flat roof in optimal condition.
Cleaning and Clearing Gutters

When maintaining the integrity of your flat roof, it is crucial to prioritize the cleaning and clearing of gutters. Proper gutter maintenance is essential in preventing water damage and ensuring the longevity of your roof. Over time, debris such as leaves, twigs, and dirt can accumulate in the gutters, causing blockages and hindering the proper flow of water. This can lead to water overflow, which can damage the roof and the foundation of your home.
To effectively clear and clean your gutters, follow these simple steps:
| Step | Instructions |
|---|---|
| 1. | Use a ladder to safely access the gutters. Ensure the ladder is stable and securely positioned. |
| 2. | Wear gloves to protect your hands and remove any large debris by hand. Place the debris in a bucket or trash bag for disposal. |
| 3. | Use a small garden trowel or gutter scoop to clear out smaller debris and residue. Make sure to remove all obstructions from the gutter channel. |
| 4. | After clearing the gutters, flush them with water to ensure proper drainage. Use a hose or a pressure washer on a low setting to remove any remaining debris.
Regularly clearing debris and maintaining your gutters will prevent clogs, water damage, and potential roof leaks. By incorporating these gutter maintenance practices into your routine, you can protect your flat roof and ensure its longevity.
Applying Roof Coating
When it comes to applying roof coating, proper preparation is essential for a successful outcome. This includes thoroughly cleaning the roof surface, repairing any damage, and ensuring the area is dry before proceeding.
Additionally, choosing the right coating for your specific roof type and climate is crucial for long-lasting protection and durability.
Proper Preparation for Coating
To properly prepare for applying roof coating, we recommend thoroughly cleaning the surface and repairing any damaged areas. This step is crucial to ensure a smooth and long-lasting coating application. Here are some essential tips to help you with the preparation process:
- Remove any debris, dirt, or loose materials from the roof surface using a broom or pressure washer.
- Inspect the roof for any cracks, holes, or leaks, and repair them using an appropriate sealant or patching material.
- Check for any signs of rust or corrosion on metal surfaces and treat them with a rust inhibitor or primer.
- If there are any existing coatings or old roof materials, make sure to remove them completely before applying the new coating.
- Allow the roof surface to dry completely before proceeding with the coating application.
Choosing the Right Coating
After properly preparing the roof surface, the next crucial step in DIY flat roof repair is choosing the right coating for your project.
When it comes to choosing the right materials, there are a few factors to consider. First, determine the type of coating that best suits your roof's needs. Common options include acrylic, silicone, and asphalt-based coatings. Consider the climate and weather conditions in your area, as they can affect the durability and performance of the coating. Additionally, think about the specific requirements of your roof, such as flexibility, UV resistance, and waterproofing capabilities.
Once you have chosen the appropriate coating material, it's important to follow the proper application techniques. Read and follow the manufacturer's instructions carefully, ensuring that you apply the coating evenly and in the recommended thickness. Proper application techniques will ensure a long-lasting and effective repair for your flat roof.
Reinforcing Weak Roof Areas
We can reinforce weak areas on a flat roof by implementing effective repair techniques and utilizing high-quality materials. Strengthening weak spots is crucial to maintaining the integrity and longevity of the roof structure.
Here are some essential DIY hacks to reinforce weak roof areas:
- Inspect the roof thoroughly: Identify any weak spots or areas of concern before starting the repair process. Look for signs of deterioration, such as cracks, sagging, or water damage.
- Reinforce the decking: Strengthen the roof's foundation by reinforcing the decking. Use plywood or OSB (oriented strand board) to add extra support to weak areas.
- Install additional support beams: If the weak spots are due to inadequate support, consider installing additional support beams. These beams will help distribute the weight evenly and prevent further damage.
- Apply reinforcing fabric: Apply reinforcing fabric over weak areas to provide an extra layer of protection. This fabric, when combined with a waterproof coating, will help strengthen the roof and prevent leaks.
- Use high-quality sealants: Choose high-quality sealants and adhesives specifically designed for flat roofs. These products will help seal any gaps or cracks, reinforcing weak areas and preventing water infiltration.
Installing Proper Insulation
Installing proper insulation is a crucial step in ensuring the energy efficiency and comfort of a flat roof. When it comes to insulation options, there are several choices available that offer varying levels of performance and affordability.
The first option is fiberglass insulation, which is widely used due to its affordability and ease of installation. It's made up of small glass fibers that trap air, providing excellent thermal resistance.
Another option is foam board insulation, which offers superior insulation properties and is highly resistant to moisture. This type of insulation is often used in areas with high humidity or potential water infiltration.
Additionally, spray foam insulation is a popular choice for flat roofs as it can be applied directly to the roof surface, sealing any gaps or cracks and providing an effective barrier against heat loss or gain.
Proper insulation installation is key to achieving optimal performance. It's important to ensure that the insulation is installed correctly, with no gaps or compressed areas that could compromise its effectiveness. Additionally, adequate ventilation should be provided to prevent moisture buildup and the potential for mold growth.
Preventive Maintenance Tips

To ensure the longevity and durability of your flat roof, regular preventive maintenance is essential. By conducting routine roof inspections and implementing weatherproofing techniques, you can effectively protect your roof from potential damage and costly repairs. Here are some preventive maintenance tips that will help you keep your flat roof in optimal condition:
- Conduct regular roof inspections: Inspect your roof at least twice a year, in the spring and fall, to identify any signs of damage or wear. Look for cracks, leaks, loose or missing shingles, and any other issues that may compromise the integrity of your roof.
- Clean and clear debris: Remove any debris, such as leaves, branches, and dirt, from your roof regularly. Accumulated debris can block drainage systems and cause water to pool on your roof, leading to leaks and water damage.
- Maintain proper drainage: Ensure that your roof's drainage systems, such as gutters and downspouts, are clear and functioning properly. Clogged or damaged drainage systems can cause water to seep into your roof and cause structural damage.
- Seal and weatherproof vulnerable areas: Pay special attention to areas prone to leaks, such as flashing around chimneys, vents, and skylights. Apply appropriate sealants and weatherproofing materials to prevent water infiltration.
- Address issues promptly: If you notice any signs of damage or leaks during your inspections, address them promptly. Prompt repairs can prevent further damage and extend the lifespan of your roof.
Frequently Asked Questions
How Can I Tell if My Flat Roof Is in Need of Repair or Replacement?
We can easily determine if our flat roof needs repair or replacement by looking out for signs of damage. Some common indicators include:
- Leaks
- Cracks
- Blistering
- Sagging
It's important to assess the extent of the damage to determine the necessary repairs. This can be done by:
- Inspecting the roof for any visible issues
- Checking for water stains on the ceiling
- Conducting a thorough examination of the roof's structure.
What Are Some Common Causes of Roof Leaks in Flat Roofs?
Common causes of roof leaks in flat roofs include poor installation and aging materials. These factors can lead to gaps or cracks in the roofing system, allowing water to seep through and cause leaks.
It's important to address these issues promptly to prevent further damage to the roof and the interior of the building. Regular inspections and maintenance can help identify potential problems and ensure the longevity of the flat roof.
Can I Use Regular Household Materials to Patch Small Holes in My Flat Roof?
Yes, we can definitely use regular household materials to patch small holes in our flat roof. It's amazing how everyday items like duct tape and tar can work wonders in DIY flat roof patching. These simple and inexpensive solutions can save us a lot of money on professional repairs.
However, it's important to note that while these methods may be effective for small hole repairs, larger or more serious flat roof repairs should always be done by a professional. Safety first!
Are There Any Safety Precautions I Should Take Before Attempting DIY Flat Roof Repairs?
Roofing safety is of utmost importance when attempting DIY flat roof repairs. There are several precautions that should be taken to ensure a safe working environment.
First, always wear appropriate protective gear such as gloves, safety glasses, and non-slip footwear.
Additionally, make sure to work on a stable and secure surface, using ladders or scaffolding if necessary.
It's also crucial to be aware of electrical hazards and to properly secure any tools or materials.
What Are Some Signs That My Flat Roof May Have Weak Areas That Need Reinforcement?
When it comes to flat roofs, it's important to be aware of signs that indicate weak areas. Some common indicators include sagging or dipping in the roof surface, water pooling, and cracks or tears in the roofing material.
If you notice any of these signs, it's crucial to reinforce the weak areas promptly to prevent further damage. Reinforcement methods can include adding additional layers of roofing material, installing support beams, or applying a roof coating specifically designed for strengthening flat roofs.